Sandsend Tunnel
Sandsend Tunnel
![Colourful sandstone contributes to Sandsend's classic single-track portal, although vegetation is doing its best to mask it.](http://www.forgottenrelics.org/wp-content/uploads/2023/03/image1-186.jpg)
![Inside, the original lining was masonry built but subsequent patch repairs have been actioned in brick.](http://www.forgottenrelics.org/wp-content/uploads/2023/03/image2-186.jpg)
![Shafts 1, 3 and 5 are larger in diameter than the other two and were built in 1900 after footplate complaints about poor ventilation.](http://www.forgottenrelics.org/wp-content/uploads/2023/03/image3-186.jpg)
![At various locations, the west sidewall is subject to considerable lateral forces, resulting in bulging and fracturing of the brickwork.](http://www.forgottenrelics.org/wp-content/uploads/2023/03/image4-185.jpg)
![Refuges are frequent and generously proportioned but many are succumbing to the effects of water ingress.](http://www.forgottenrelics.org/wp-content/uploads/2023/03/image5-185.jpg)
![Two horizontal adits were driven from the tunnel to the cliff-face, allowing spoil to be tipped into the sea.](http://www.forgottenrelics.org/wp-content/uploads/2023/03/image6-180.jpg)
![Short sections of bullhead rail wait to be reclaimed.](http://www.forgottenrelics.org/wp-content/uploads/2023/03/image7-171.jpg)
![Tipped debris from the shafts' protection walls acts as a dam, causing water to back up the 1:57 gradient.](http://www.forgottenrelics.org/wp-content/uploads/2023/03/image8-153.jpg)
![Glutinous mud collects alongside a catchpit to one of the side drains.](http://www.forgottenrelics.org/wp-content/uploads/2023/03/image9-131.jpg)
![A broken downpipe discharges water into the tunnel from No.4 shaft.](http://www.forgottenrelics.org/wp-content/uploads/2023/03/image10-102.jpg)
![The two original shafts are located above the horizontal adits.](http://www.forgottenrelics.org/wp-content/uploads/2023/03/image11-84.jpg)
![Calcite discolours the lining alongside the northernmost shaft eye.](http://www.forgottenrelics.org/wp-content/uploads/2023/03/image12-60.jpg)
![Still climbing, the soot-coated tunnel curves steadily to the east as the north portal is approached.](http://www.forgottenrelics.org/wp-content/uploads/2023/03/image13-45.jpg)
![Ground movement at the portal caused significant distortion, prompting the installation of bullhead rails for strengthening purposes.](http://www.forgottenrelics.org/wp-content/uploads/2023/03/image14-35.jpg)
![Unable to withstand the load, six feet of the tunnel collapsed in 2008.](http://www.forgottenrelics.org/wp-content/uploads/2023/03/image15-20.jpg)
![Distortion of the arch was clearly apparent during operational times.](http://www.forgottenrelics.org/wp-content/uploads/2023/03/image16-15.jpg)
![A milepost and telegraph pole stand sentinel in front of the tunnel's south portal, as the track enters on a curve.](http://www.forgottenrelics.org/wp-content/uploads/2023/03/image17-12.jpg)
![](http://www.forgottenrelics.org/wp-content/uploads/2023/03/image1-186.jpg)
![](http://www.forgottenrelics.org/wp-content/uploads/2023/03/image2-186.jpg)
![](http://www.forgottenrelics.org/wp-content/uploads/2023/03/image3-186.jpg)
![](http://www.forgottenrelics.org/wp-content/uploads/2023/03/image4-185.jpg)
![](http://www.forgottenrelics.org/wp-content/uploads/2023/03/image5-185.jpg)
![](http://www.forgottenrelics.org/wp-content/uploads/2023/03/image6-180.jpg)
![](http://www.forgottenrelics.org/wp-content/uploads/2023/03/image7-171.jpg)
![](http://www.forgottenrelics.org/wp-content/uploads/2023/03/image8-153.jpg)
![](http://www.forgottenrelics.org/wp-content/uploads/2023/03/image9-131.jpg)
![](http://www.forgottenrelics.org/wp-content/uploads/2023/03/image10-102.jpg)
![](http://www.forgottenrelics.org/wp-content/uploads/2023/03/image11-84.jpg)
![](http://www.forgottenrelics.org/wp-content/uploads/2023/03/image12-60.jpg)
![](http://www.forgottenrelics.org/wp-content/uploads/2023/03/image13-45.jpg)
![](http://www.forgottenrelics.org/wp-content/uploads/2023/03/image14-35.jpg)
![](http://www.forgottenrelics.org/wp-content/uploads/2023/03/image15-20.jpg)
![](http://www.forgottenrelics.org/wp-content/uploads/2023/03/image16-15.jpg)
![](http://www.forgottenrelics.org/wp-content/uploads/2023/03/image17-12.jpg)
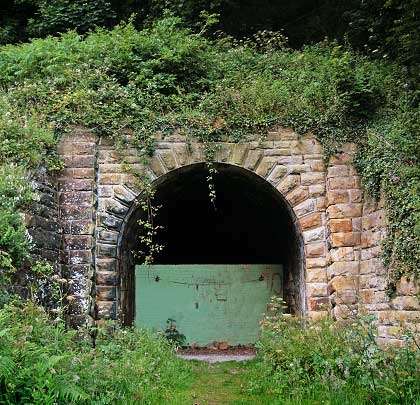
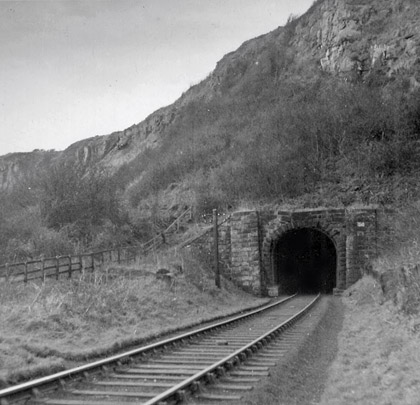
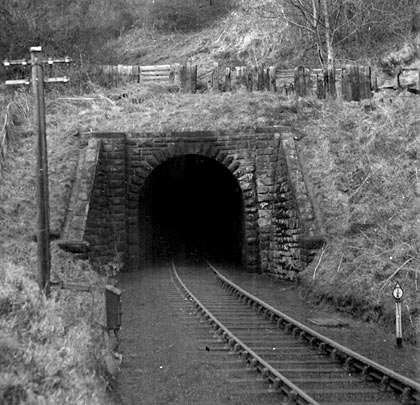
Like its sibling neighbour Kettleness, Sandsend is a tunnel which never should have been. When the Whitby, Redcar & Middlesbrough Union Railway began work on its Loftus-Whitby route in 1871 – five years after obtaining its enabling Act – the plan was to build the line along the edge of the cliffs. Work ground to a halt in 1874 when the contractor went into liquidation; when it resumed under the auspices of the North Eastern Railway, the original formation was deemed too dangerous – some of it having collapsed into the sea – and the track was re-routed via two tunnels further inland. The line opened with little ceremony on 3rd December 1883.
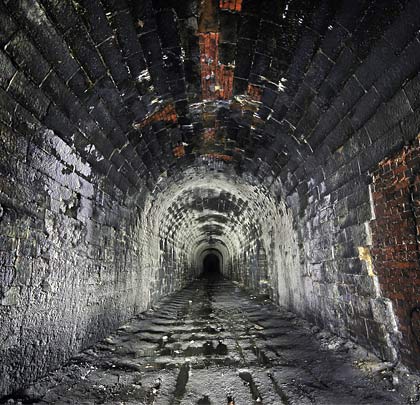
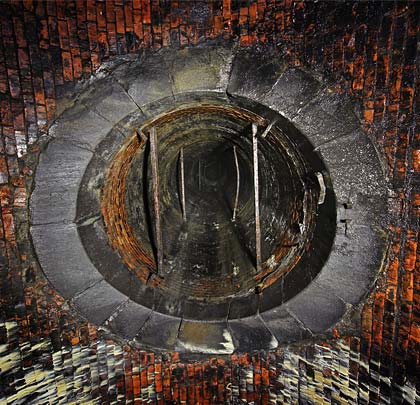
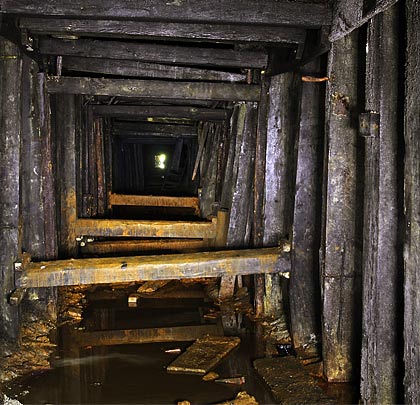
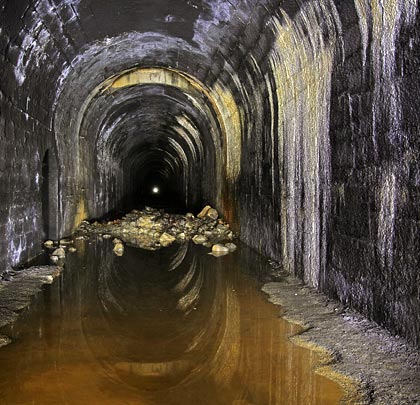
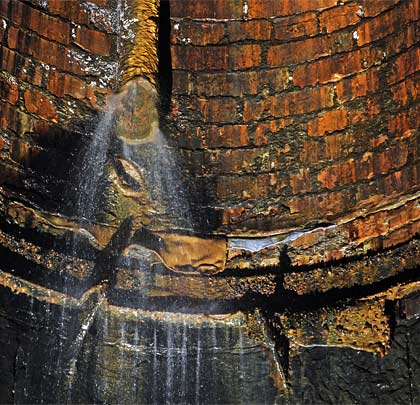
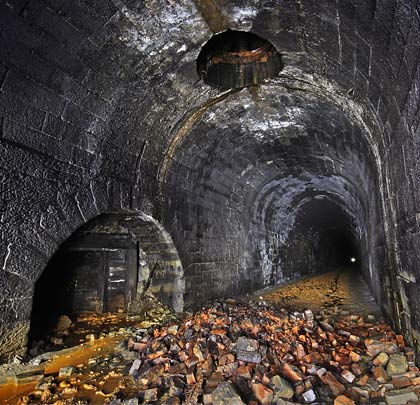
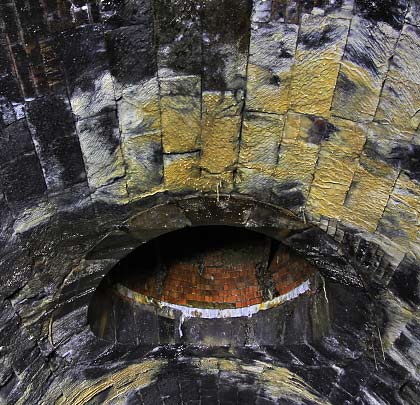
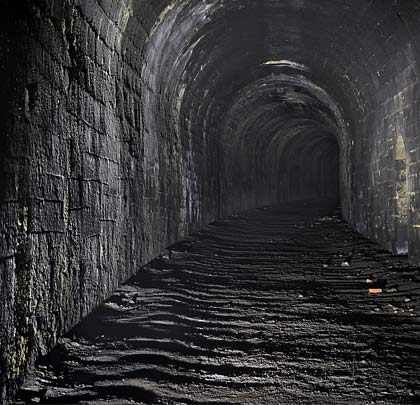
Sandsend, by far the longer of these tunnels, is 1,652 yards in length and was built to accommodate a single line, falling to the south on a gradient of 1:57. It is predominantly straight but the last ~350 yards incorporate a curve to the north of around 32 chains radius. It boasts five shafts, all of which are capped. No evidence of them is visible above ground. Shafts 2 and 4 are of a tighter diameter and were built to service the tunnel’s construction. At their bases are adits which were driven out to the cliff-face, allowing spoil from the workings to be tipped onto the shore for clearance by the sea. The three wider shafts were added in 1900.
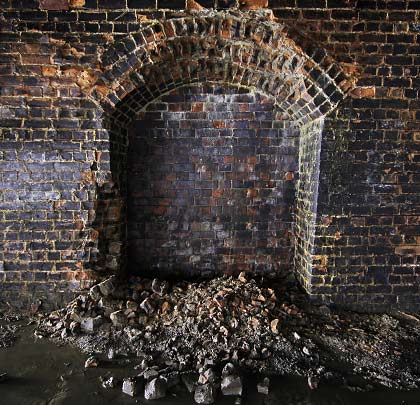
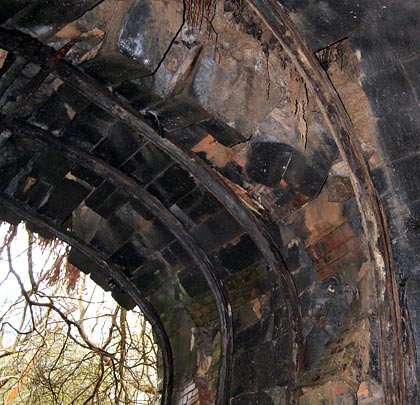
The northern portal was always problematic and had been strengthened using rings of bullhead rail. Unfortunately these could no longer take the strain and around 6 feet of the roof collapsed at the portal early in 2008, 51 years after the last train passed through it.
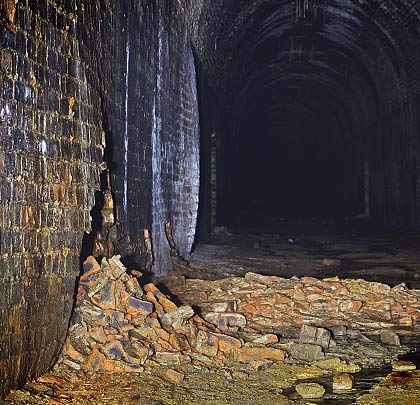
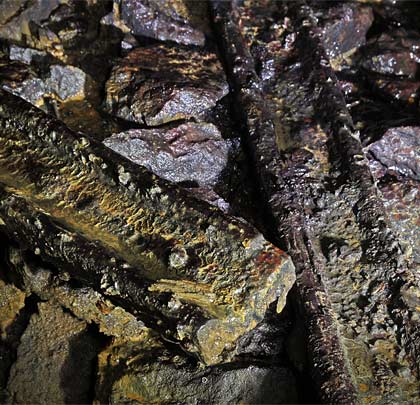
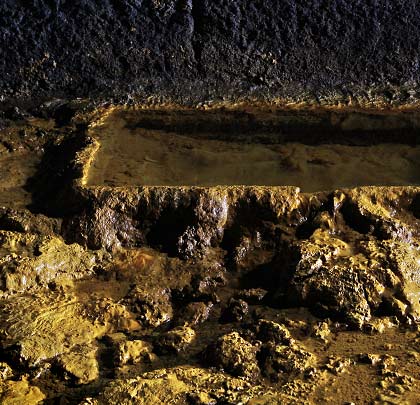
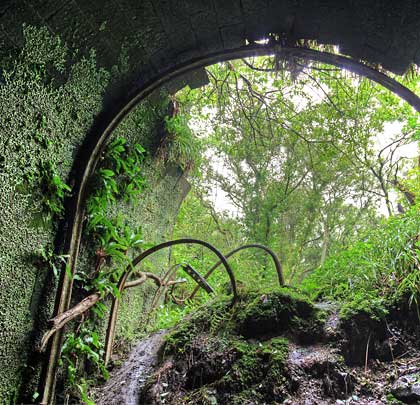
The tunnel is very wet in parts, resulting in spalling of the brickwork, some of which is significant. There is thick orange sludge for about 50 yards to the north of shaft 3. In several places, bulges are apparent in the west sidewall, resulting in fracturing and the potential for a collapse to occur.
(Twiggles’ photo is used under this Creative Commons licence.)
Click here for the tunnel’s full story.