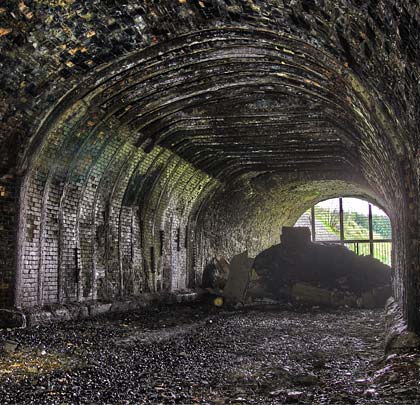
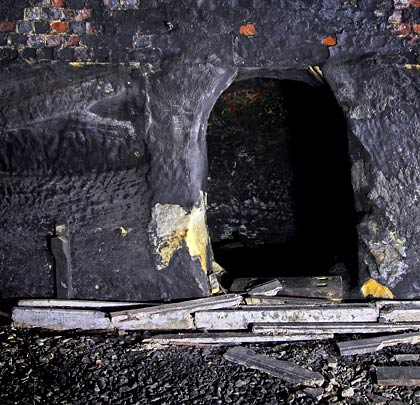
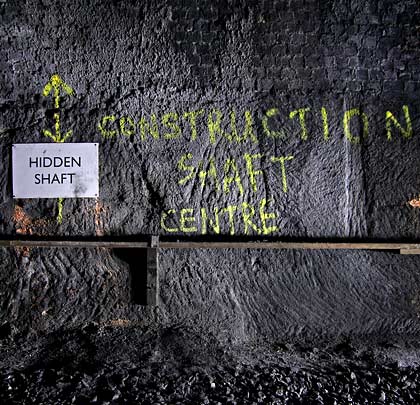
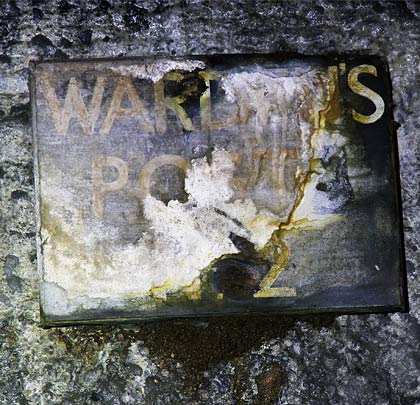
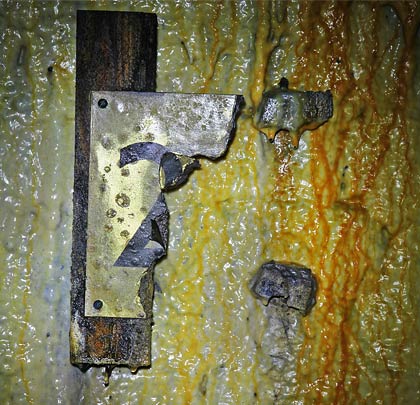
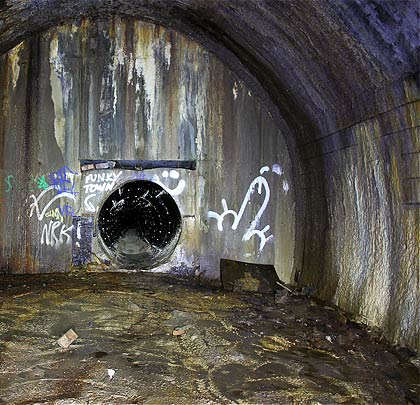
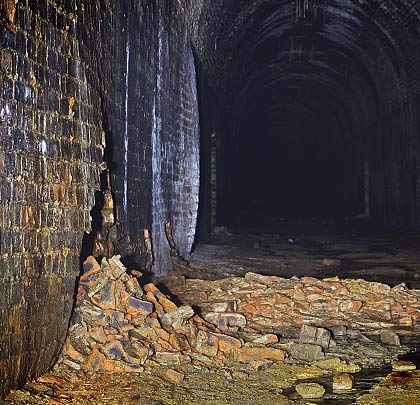
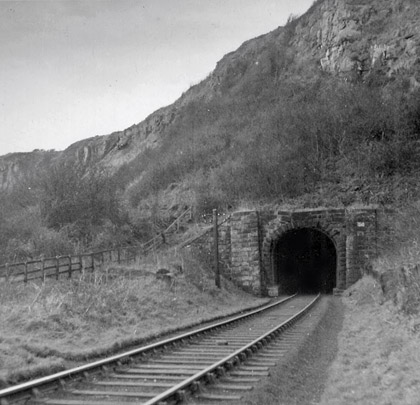
Woodhead Tunnel
Woodhead Tunnel
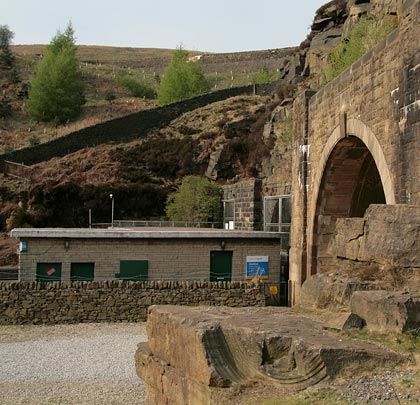
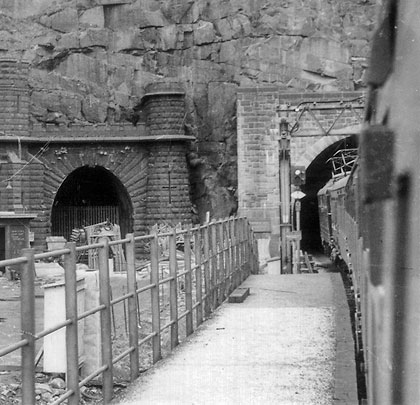
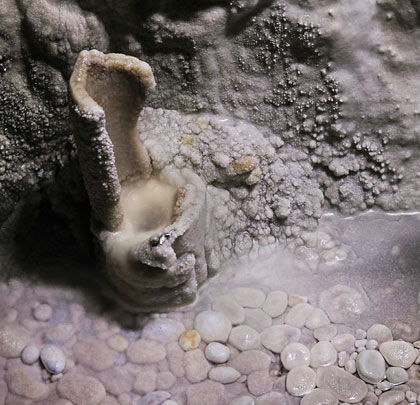
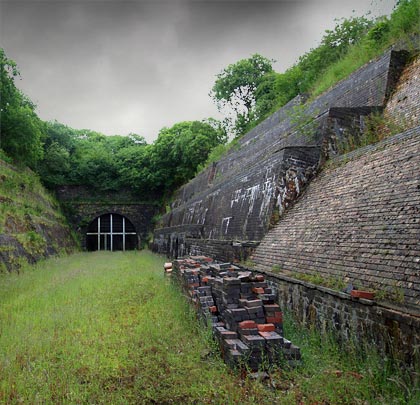
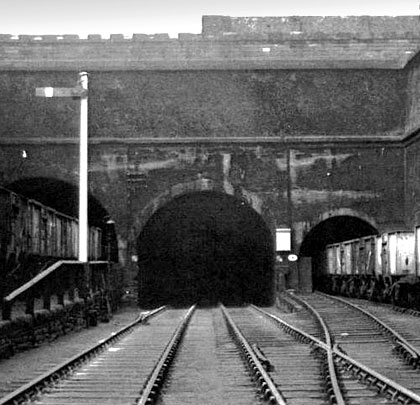
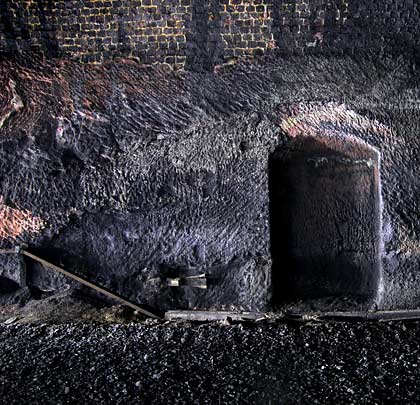
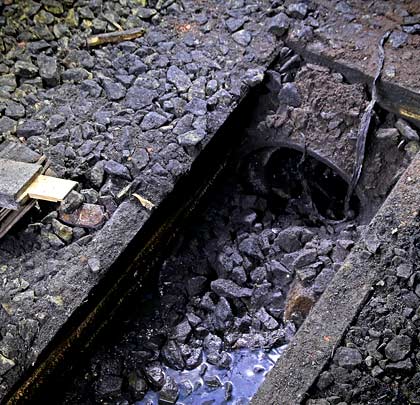
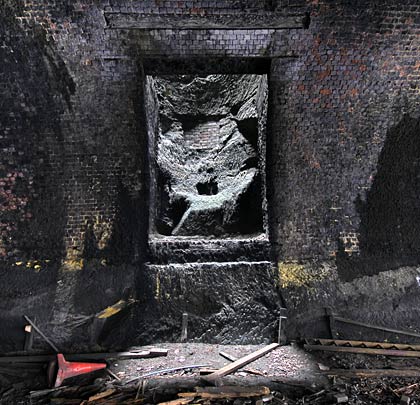
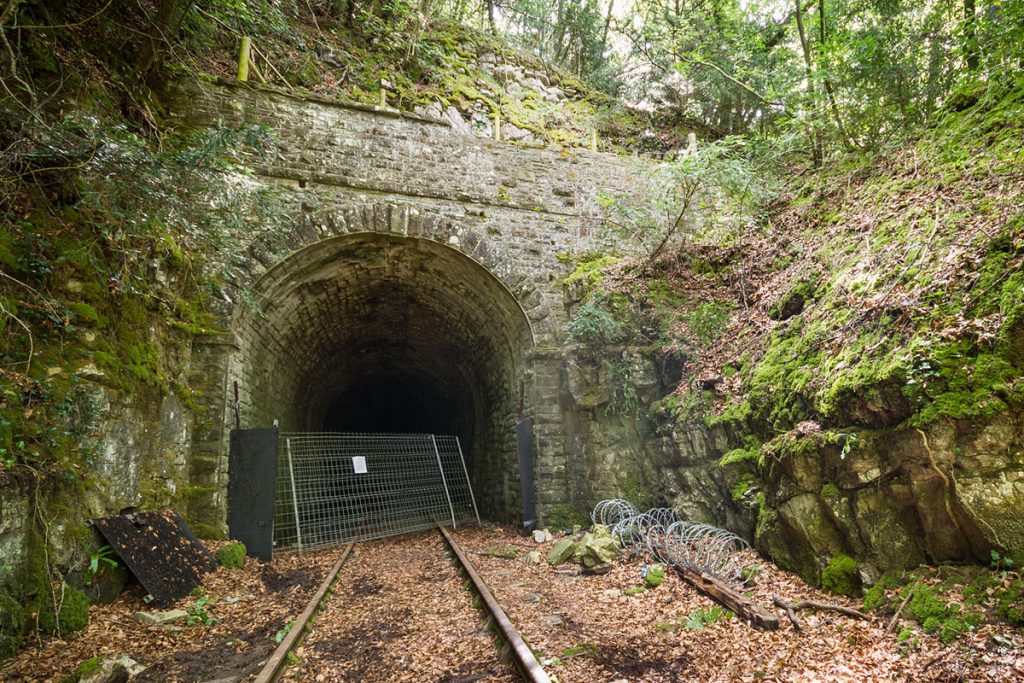
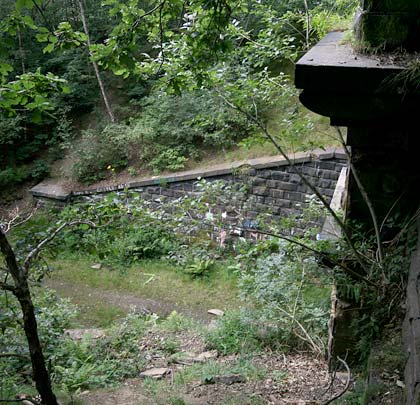
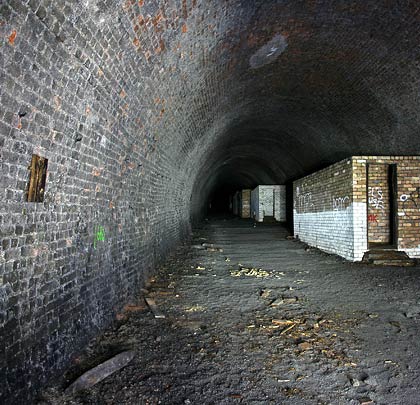
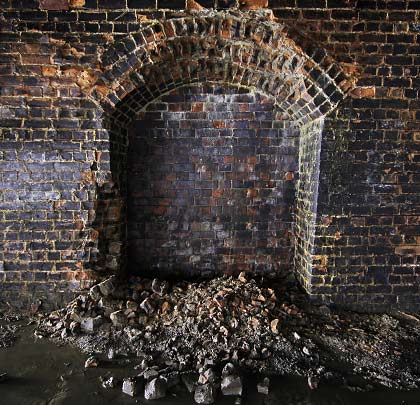
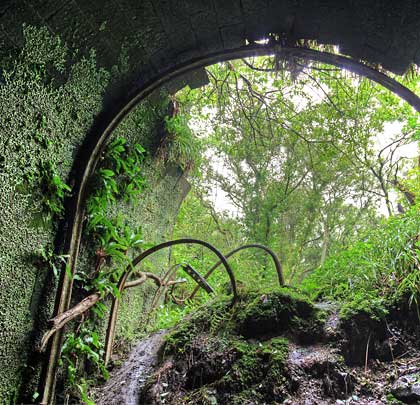
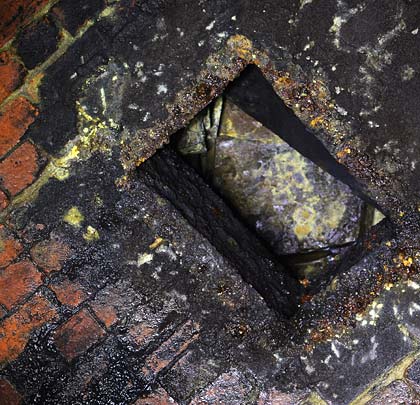
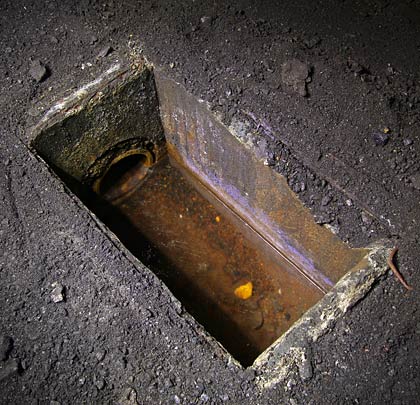
Woodhead's abandoned platforms on the western approaches to the new tunnel.
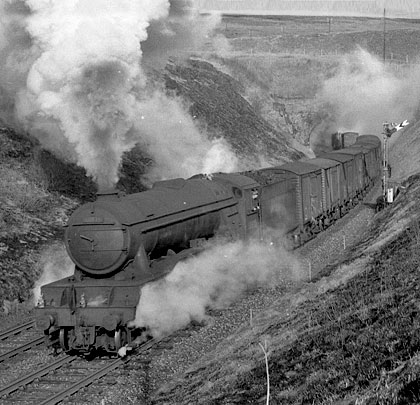
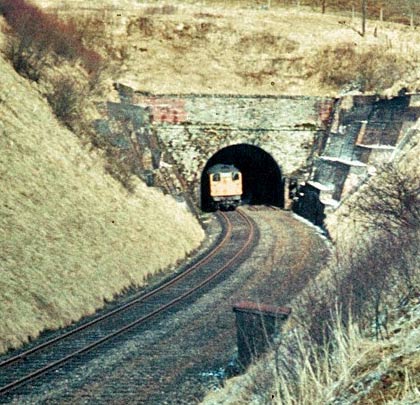
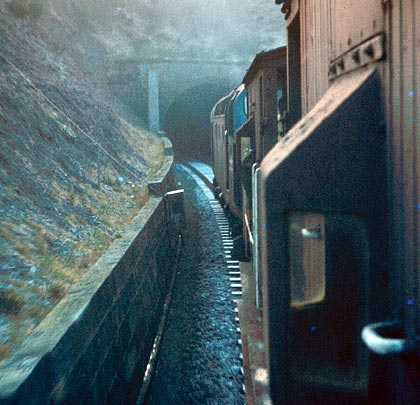
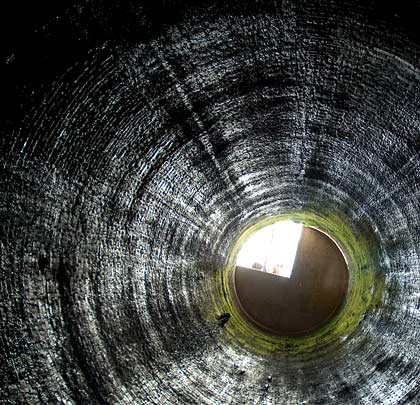
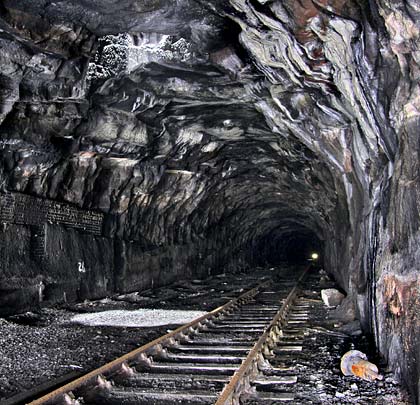
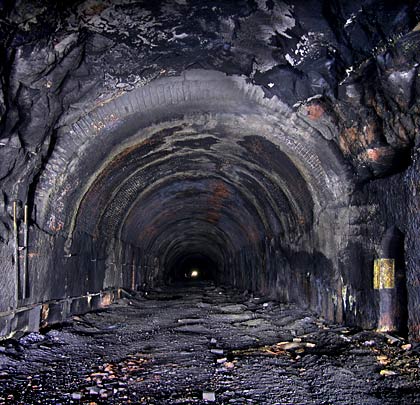
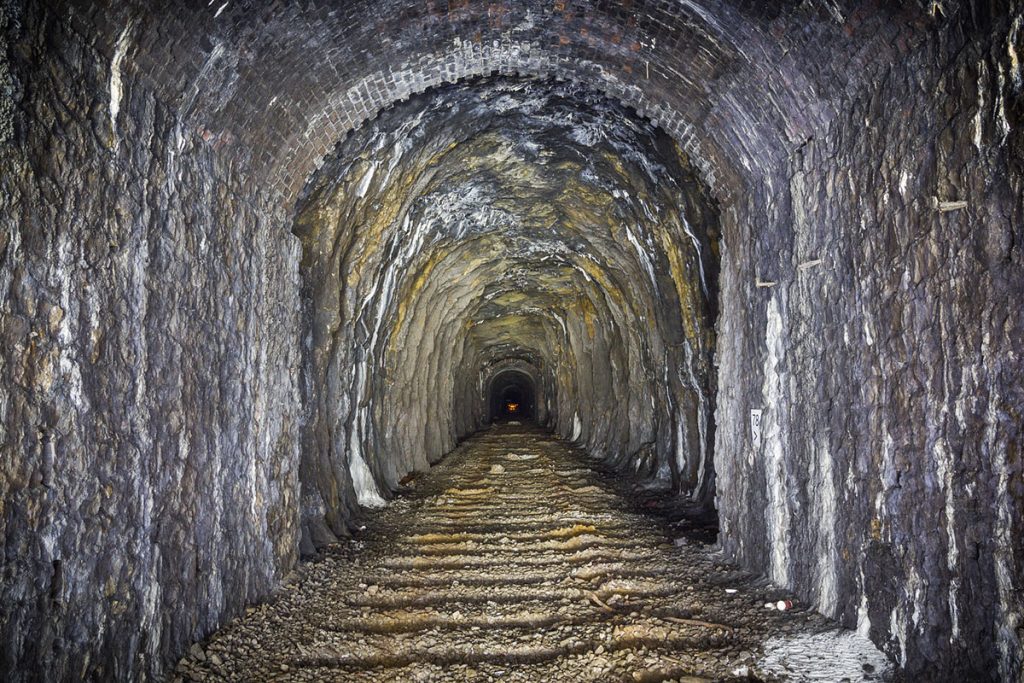
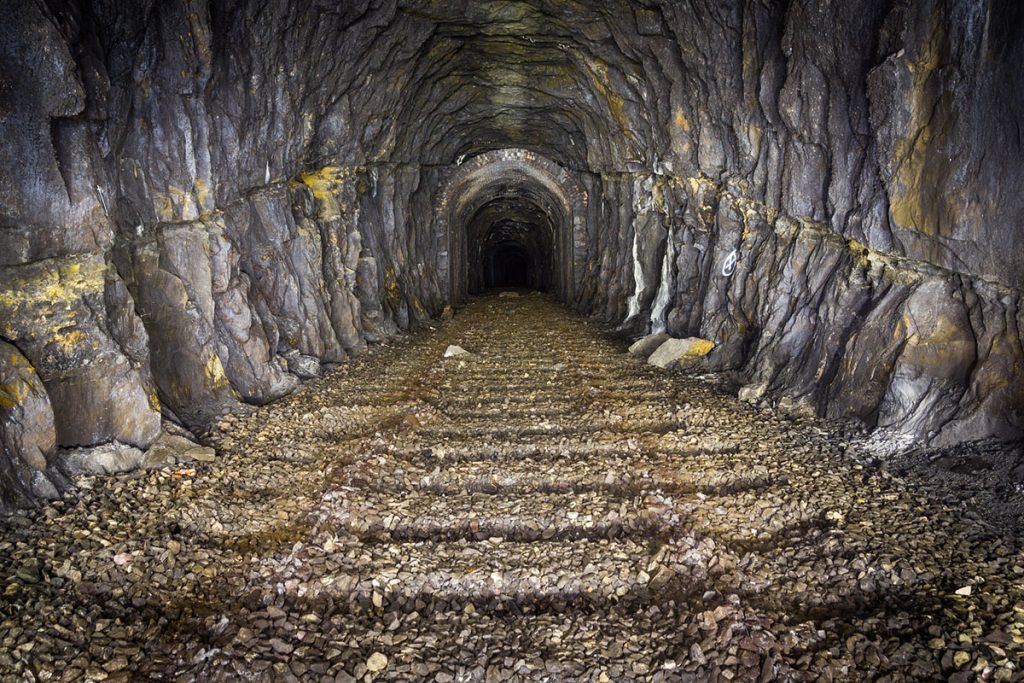
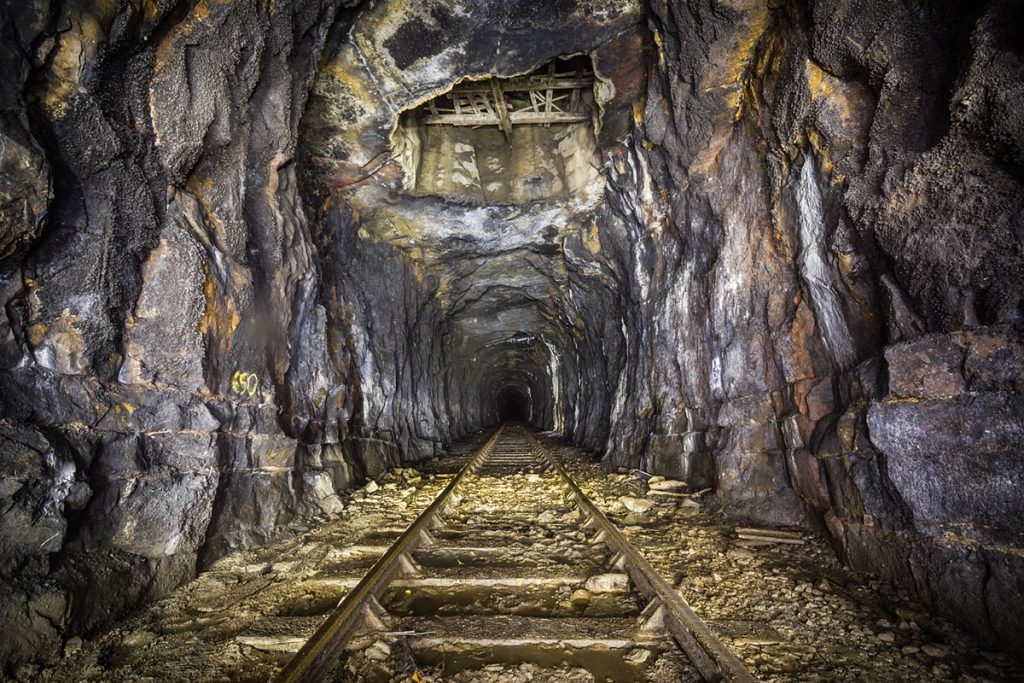
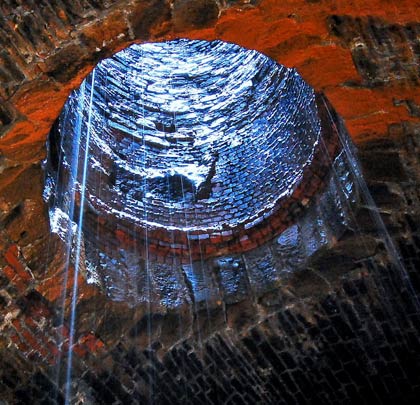
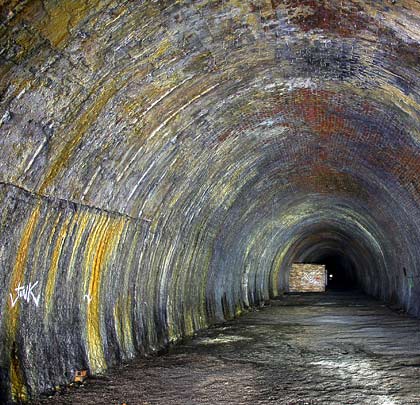
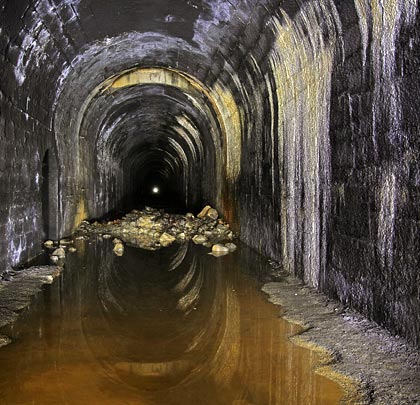
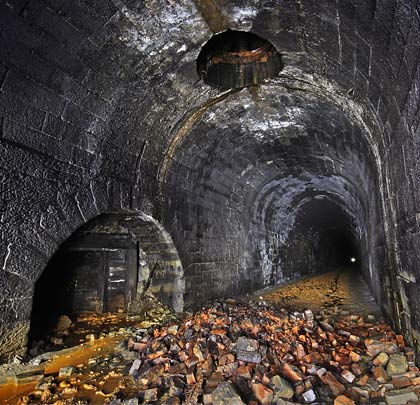
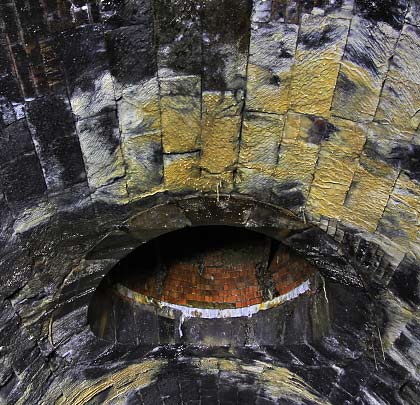
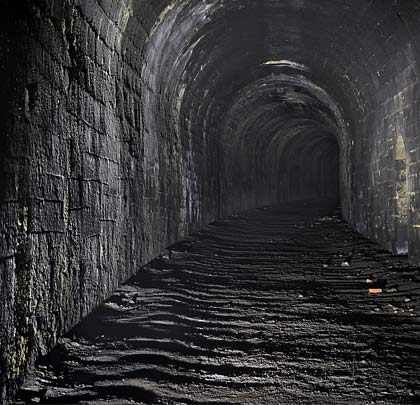
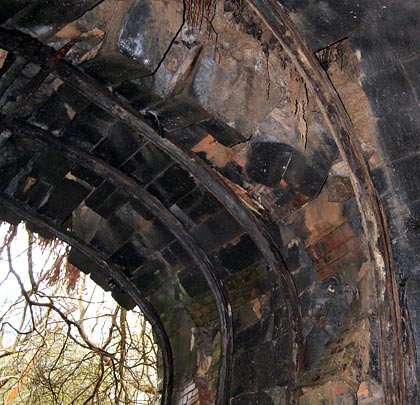
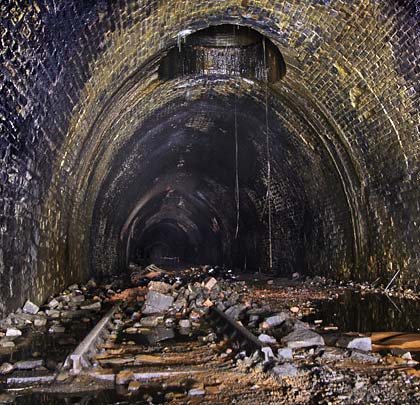
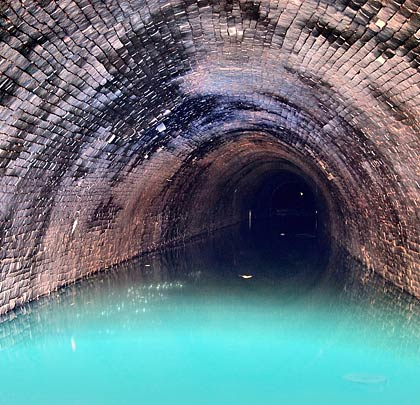
The first of Woodhead’s two single bores, engineered by Charles Vignoles and Joseph Locke, opened to traffic in 1845. It rises on a 1 in 200 gradient towards Dunford Bridge at its east end. Seven years later, the second tunnel was finished.
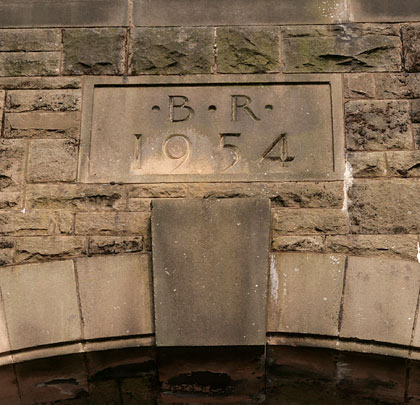
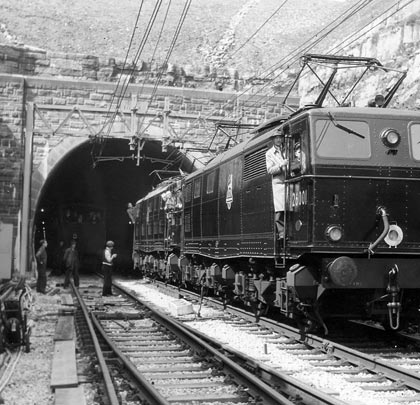
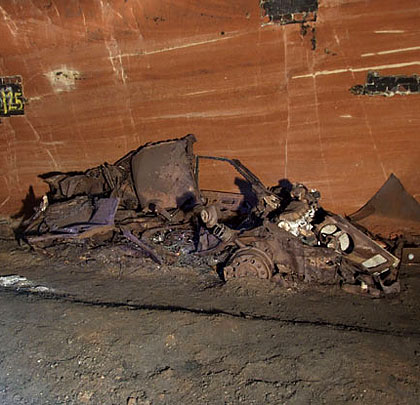
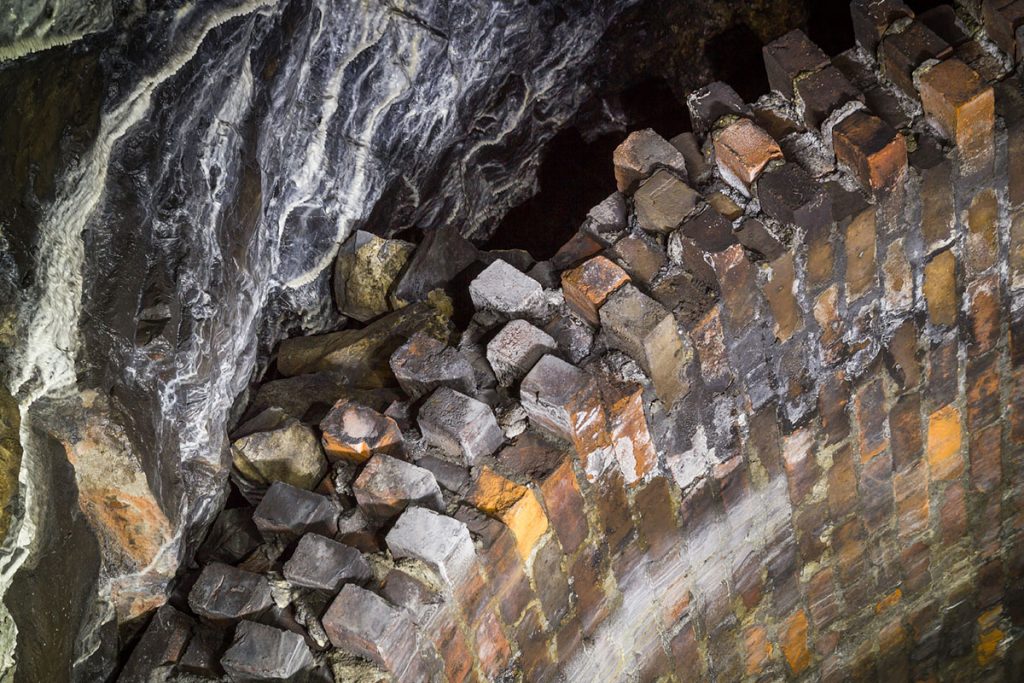
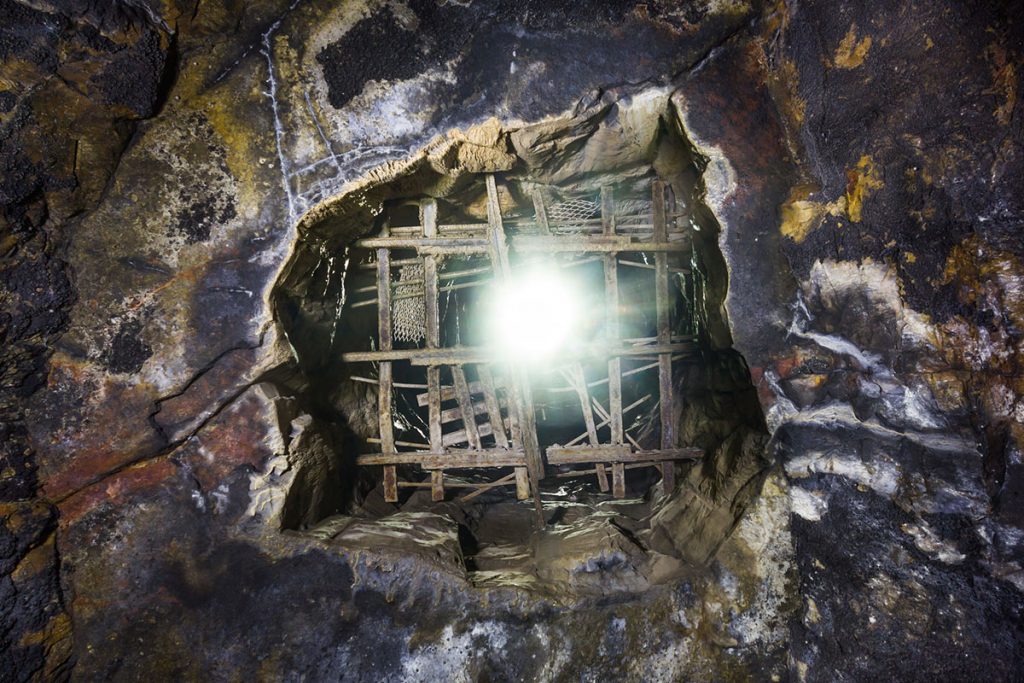
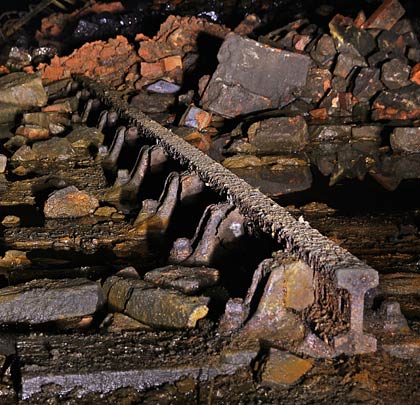
By the end of the Second World War, they were in such poor condition that Halcrow & Partners was contracted to build a new double-track tunnel. The line was also electrified. After five years work, the ribbon was cut by Transport Minister Alan Lennox-Boyd on 3rd June 1954. It cost £4.6million and six lives.
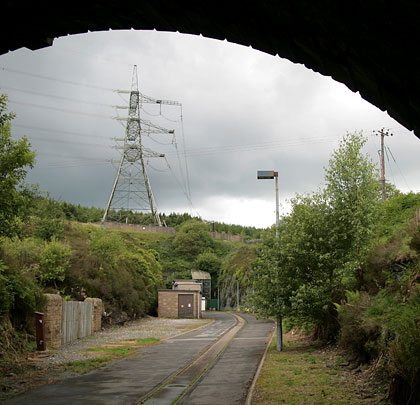
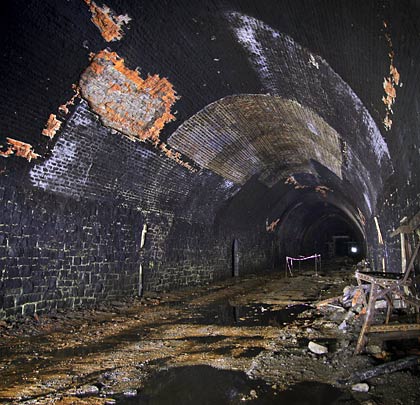
The little-used passenger service bit the dust in January 1970 but it was not until Saturday 18th July 1981 that a Harwich ferry train became the last service ever the pass through the tunnel.
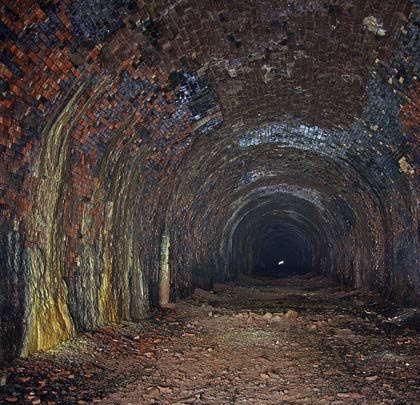
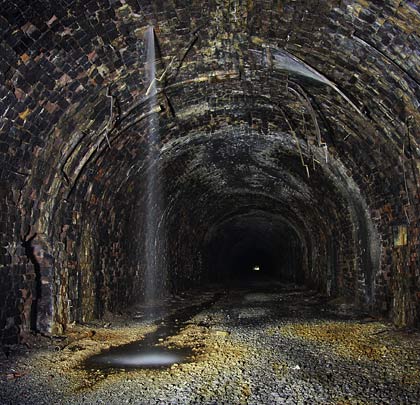
 July 2008
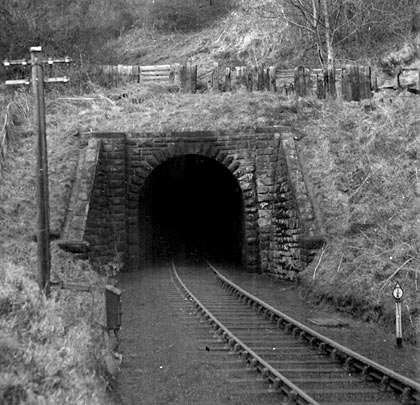
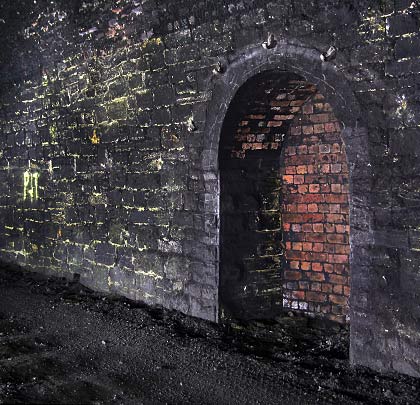
Woodhead Tunnel
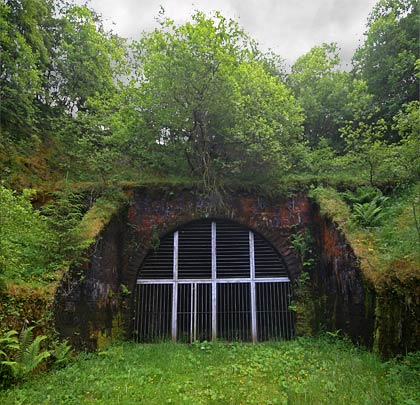
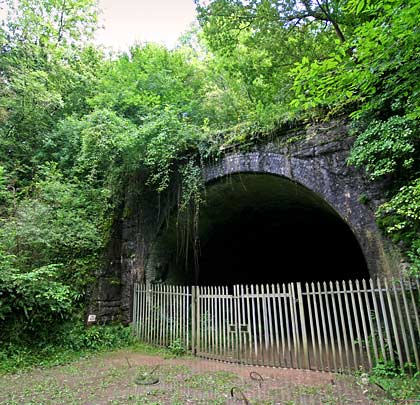
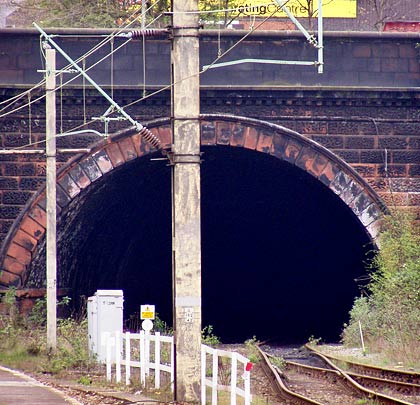
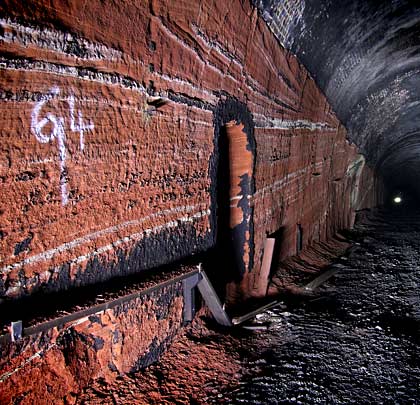
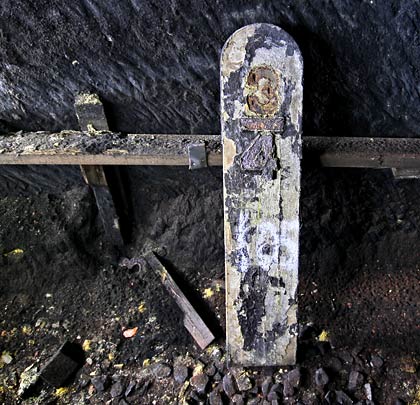
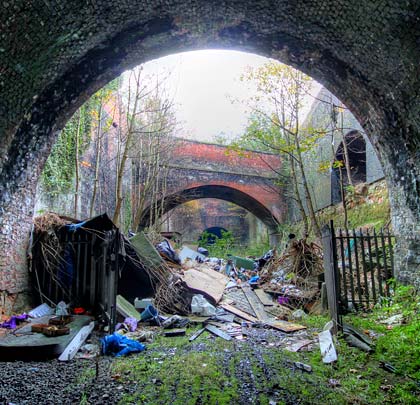
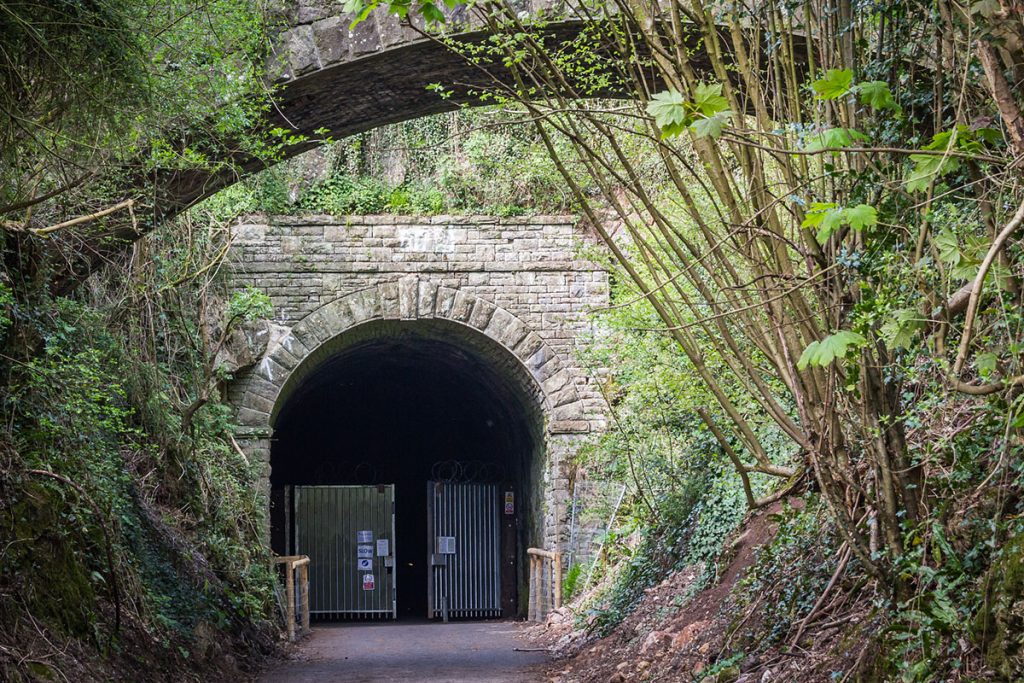
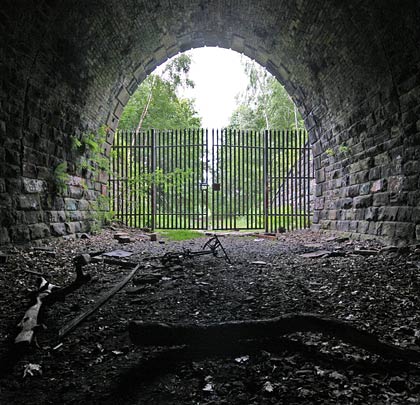
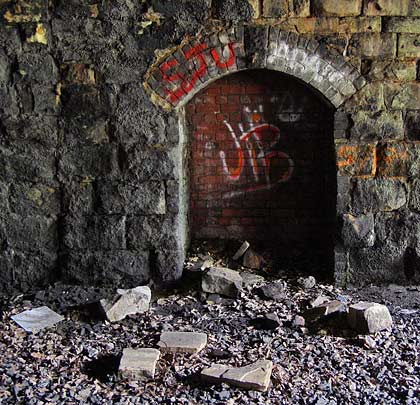
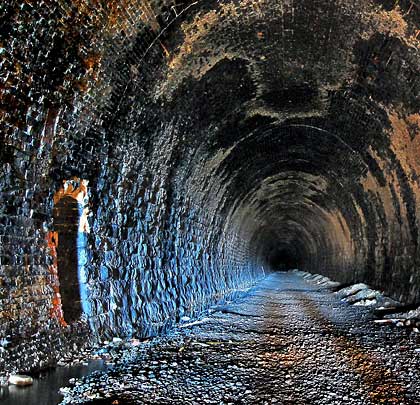
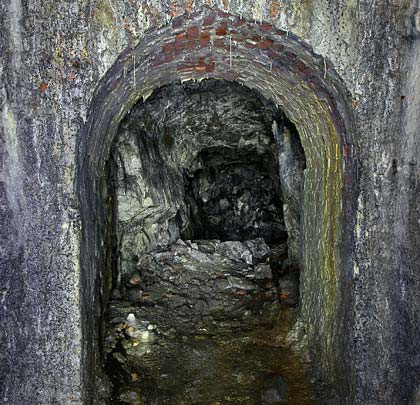
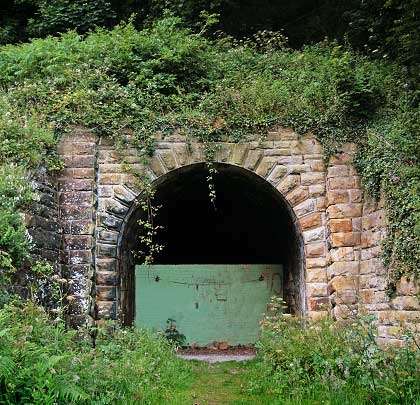
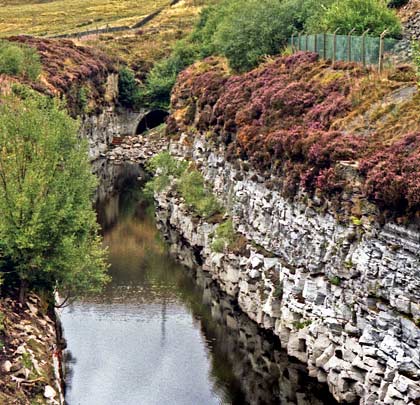
Whitrope Tunnel
The rarely visited north portal never sees the sun; moisture in the air encourages moss to carpet its stonework.
The Border Union line, built by the North British Railway and known as the Waverley, plotted a course through the often-remote landscape of the Scottish Borders from Carlisle to Hawick where it joined the company’s existing network. Here the first sod was turned on 7th September 1859, the line having been authorised by a Parliamentary Act earlier that year.
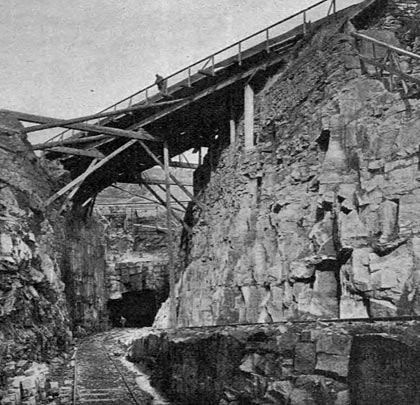
The Whitrope Contract, awarded to William Ritson, extended for 4 miles 5 furlongs and within it were two of the line’s most challenging structures: the 14-arch Shankend Viaduct and Whitrope Tunnel, Scotland’s fifth longest at 1,208 yards. Its construction, beneath Sandy Edge, was a remarkable triumph. It climbs a rising 1:96 gradient to the south and features curves at both ends, describing an S-shaped alignment. Rail level is 311 feet below the highest point of the hill, the strata being predominantly red sandstone, with limestone at the southern end. Whitrope Summit, 1,006 feet above sea level, lies 300 yards further Up the line towards Carlisle.
Headings were driven from five construction shafts. 400 gallons of water gushed into the workings every minute; of this, about 216 gallons entered by No.2 shaft alone. To minimise its impact on the work, this influx was managed by a complex drainage system.
At its peak, 600 navvies worked on the tunnel, experiencing huge variations in temperature which caused them to work in coats one minute and topless the next. At least two of them lost their lives. On 22nd April 1859, a ganger named Kingdom chose to descend one of the shafts by rope instead of the ladder provided. About 90 feet from the bottom, he lost his grip and fell, sustaining hideous injuries.
In March 1862, a group of Irish navvies celebrated St Patrick’s Day by stealing all the food and drink from a pub in Longburnshiels, wrecking the place and then attacking a number of Scottish and English labourers who lodged there. The rioting continued for days after.
The tunnel was inspected for the Board of Trade by Captain Tyler on 21st June 1862. Six weeks later, with freight services already running, the route’s formal opening for passenger traffic was marked by a huge banquet in Hawick, attended by upwards of 700 dignitaries.
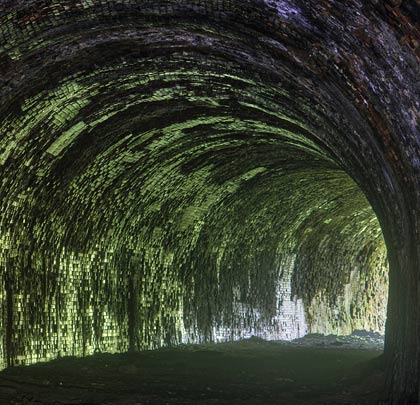
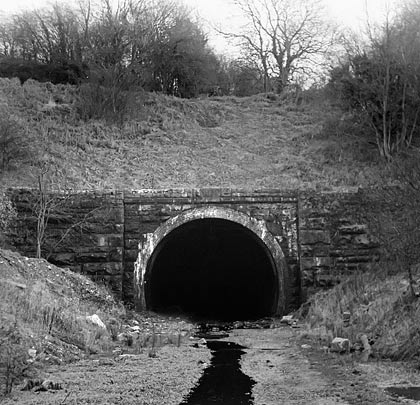
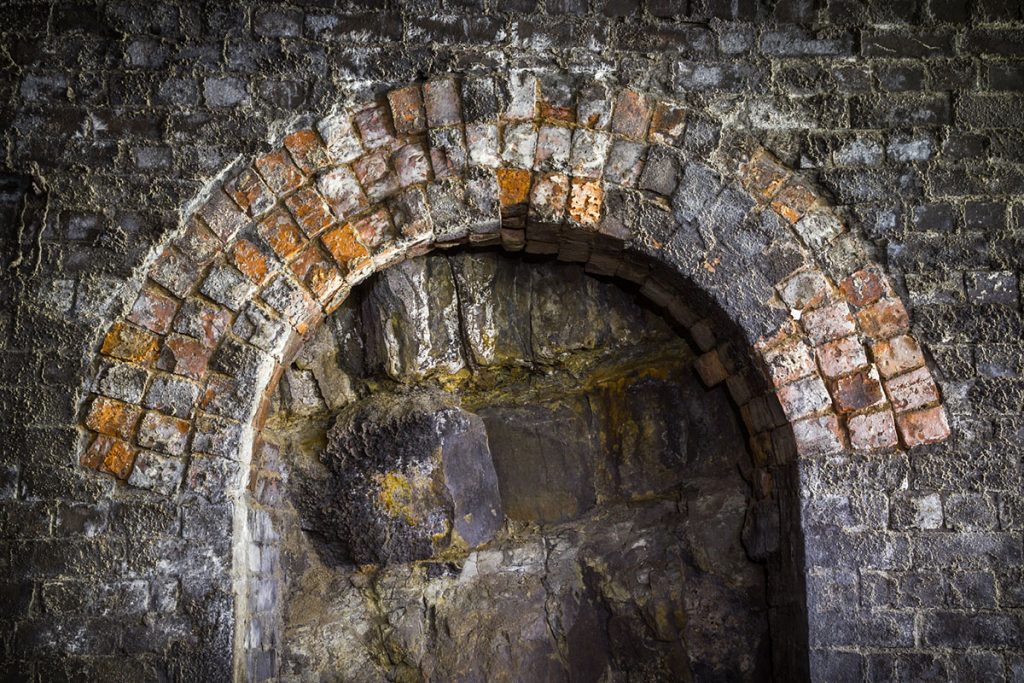
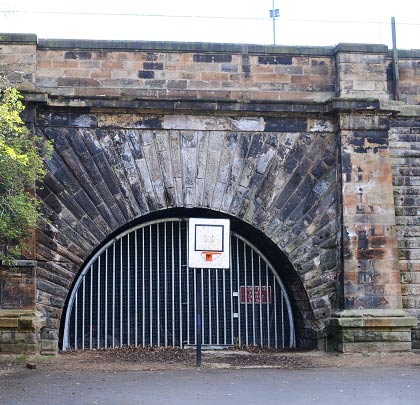
At its southern end, the tunnel features a modest masonry portal with ashlar voussoirs, projecting band course and plain spandrels, with a tall parapet set into hillside. On the approach cutting’s east side, a vast retaining wall of engineering brick – built as a result of the soft, unstable rock – comprises irregular terraces to hold back the hillside. Inset bricks are laid to form a sloped wall, all benefiting from a rock-faced ashlar supporting wall to ground level with plain copings. To the west is a lesser structure of similar style. The north portal enjoys the same design but the retaining walls are less extensive.
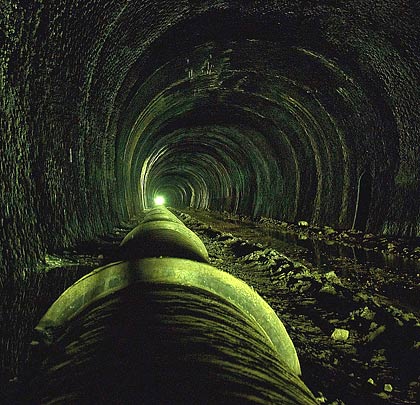
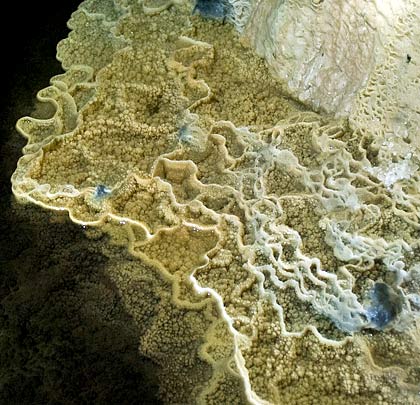
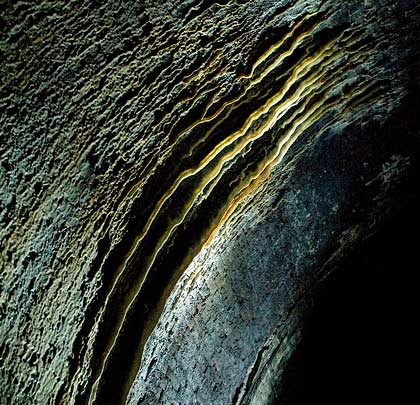
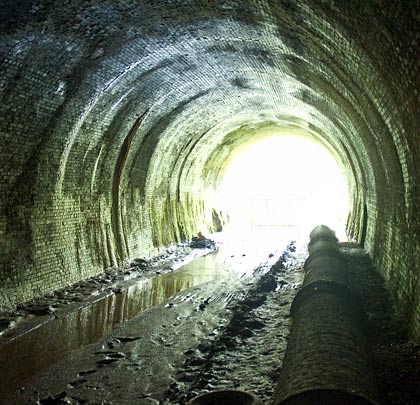
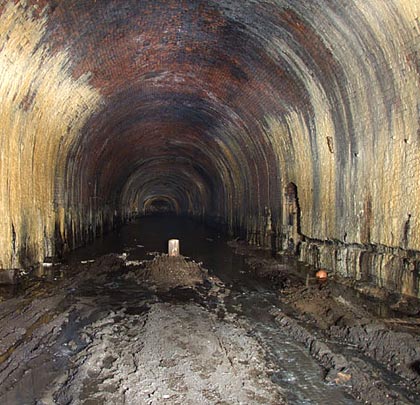
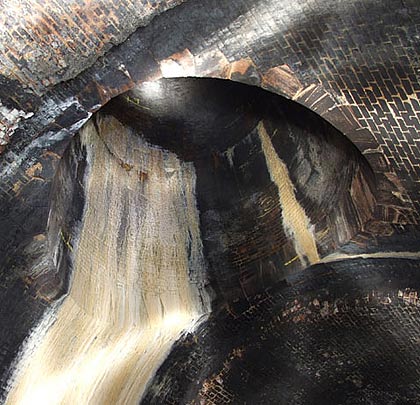
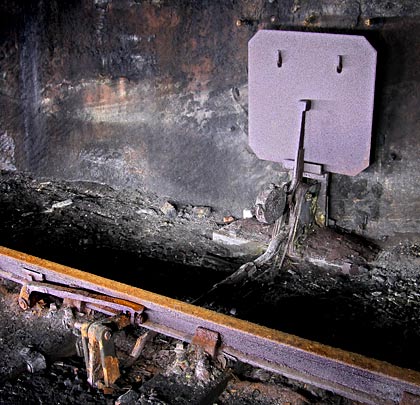
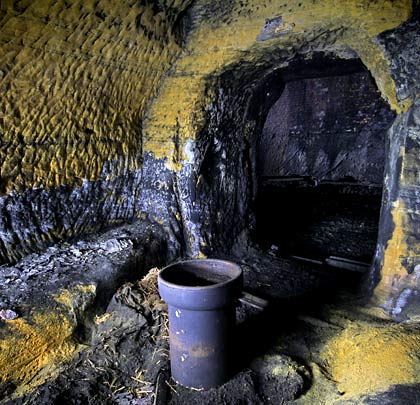
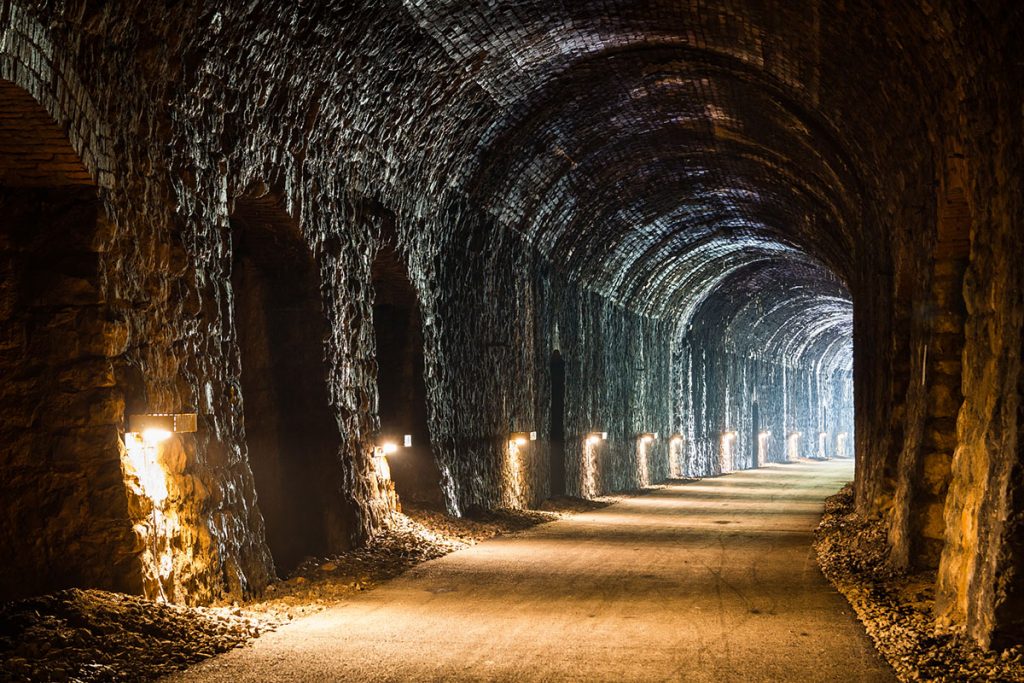
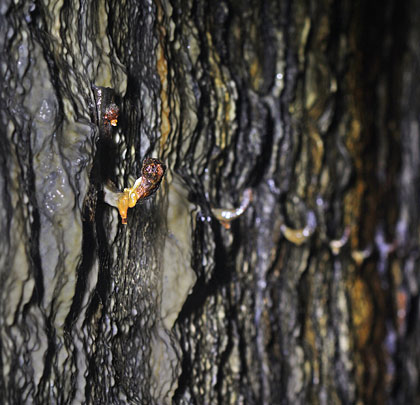
Although the tunnel was originally lined with masonry, substantial sections were replaced in brick over time. However much of this remedial work has itself deteriorated to the point where a large proportion of the bricks have lost their outer face, except where engineering brindles were used. Generally, the lining is in a poor condition, a consequence of the considerable water ingress. Despite all the shafts being hidden behind the lining, at least three of them discharge vast quantities of water into the tunnel through weep holes. The downpipes that used to carry this deluge to the drain have been removed, together with a number of catchment trays. Large areas of calcite are apparent on both walls but there is surprisingly little pondling.
The tunnel still boasts its ballast base, with one open catchpit providing access to the large central drain below the trackbed. Inserted into both sidewalls, which locally are supported on exposed rock footings, are generous refuges of assorted proportions.
At the south end, distortion of the lining prompted the insertion of 16 steel ribs with infill brickwork; several of the ribs have strengthening webs at the crown. However in March 2002, a section of roof immediately to the south of this section gave way, depositing many tonnes of rock and debris onto the solum. Since then the previously-open tunnel has been secured with steel fencing.
The Waverley line closed in January 1969 after which the Up line was soon lifted. The Down line was visited by an engineer’s special on 1st April 1970 before it too was taken up. In recent years, the efforts of the Waverley Route Heritage Association – which has laid a section of track on the approach to the tunnel – have been rewarded with the Grade B listing of the tunnel, affording it some future protection.
Click here for Dick Sullivan’s story ‘Navvymen’ which covers the construction of Whitrope Tunnel and other nearby structures.
July 2008
Whitrope Tunnel
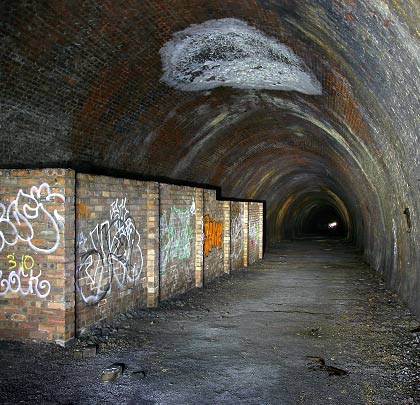
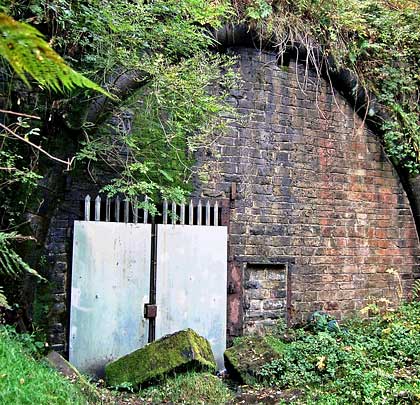
Wenvoe Tunnel
Knee-deep in muddy water, Wenvoe's northern portal.
(Photos 15 © Transport Treasury/Norris Forrest, photos 16 & 17 © Bruce McCartney)
The Barry Railway Company was born to release the stranglehold of the Taff Vale Railway and Cardiff Docks on the export of South Wales’ coal. Work on it started in 1885 and thanks to their efficiency, by 1910, Barry Docks had overtaken their near neighbour in terms of tonnage shifted.
Within four years, the company had built a substantial rail network including several branches and an 18½-mile main line from Trehafod into the docks. Included in this was a double-track bore of 1,868 yards at Wenvoe which first saw active service in 1889.
The tunnel is brick lined except for a short section at its southern end where a change in geology occurs. Towards its centre is a single ventilation shaft, also brick lined and almost the full width of the structure.
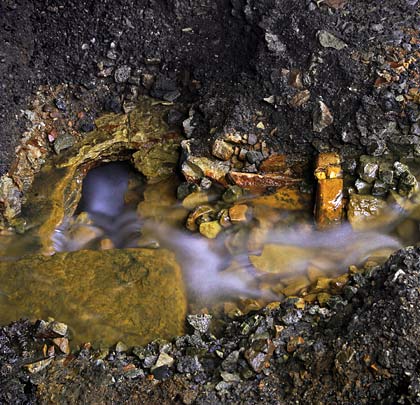
Traffic through the tunnel came to a premature close on 31st March 1963 thanks to a fire which destroyed Tynycaeau North signal box. Since then, it has become home to a large water main and extraordinary mineral deposits which adorn the walls. A pile of junk has come to rest at the foot of the shaft and the tunnel now suffers badly from flooding, with waters reaching a depth of four feet after heavy rainfall.
Click here for more of Sparhawk’s pictures.
Click here for more of Ben Salter’s tunnel shots (Flickr).
June 2014
Wenvoe Tunnel
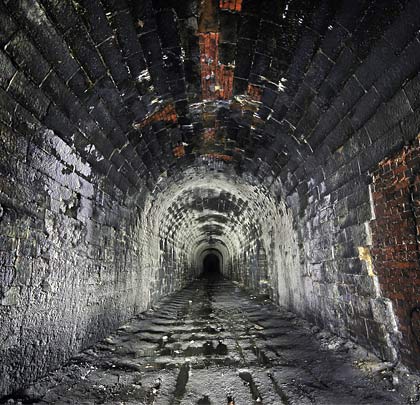
Wapping Tunnel
Wapping has a brick roof and many ample alcoves.
(Photos 2-7 © Sparhawk, photos 8 & 9 © Ben Salter)
Built on a severe 1 in 48 gradient, the line through Wapping tunnel from Liverpool docks was originally rope-worked, with wagons hauled up to Edge Hill by a stationary steam engine. Opened in 1830, it was one of the earliest railway tunnels and, at 2,111 yards, one of the longest. At the docks end, it splits into three.
Above ground, Wapping boasts three imposing ventilation towers. Closed in 1972, Merseyrail is reportedly considering reopening the tunnel, allowing its services to reach Huyton and St Helens.
Click here for more of Keffa’s Wapping shots (28 Days Later).
June 2011
Wapping Tunnel
Victoria Tunnel
Now Grade II listed, the eastern portal is built from pink sandstone and was sufficiently wide to accommodate switches and crossings.
(Photos 1-6 © Keffa, photo 7 © Dave Root, photos 8-9 © Waterways)
In 1845 Parliament passed an enabling Act authorising the Liverpool & Manchester Railway (L&MR) to construct a new line from Edge Hill Station to Waterloo Docks. Those powers were vested in the London & North Western Railway (LNWR) by an Act of 1846 following its acquisition of the L&MR.
The two tracks would be pushed beneath Liverpool in a tunnel of just over two miles. On 31st July 1846 LNWR director Henry Booth put its construction out to tender, requiring proposals to be submitted within six weeks. These were reviewed by its Chief Engineer Edward Woods. By this time, the tunnel had already been set out and several of the construction shafts – of which there were at least 13 – were being sunk.
From Byrom Street eastwards the work proved difficult and perilous, labourers driving through treacherous ground and having to support the excavations with the great care. Buildings were demolished between Byrom Street and Fontenoy Street to allow the section to be fully opened out, becoming a box cutting of 69 yards in length where two sidings were laid.
Attempts to drive the tunnel’s remaining portion through clay towards the docks resulted in some houses giving way or being rendered so dangerous that their inhabitants were forced to abandon them at short notice. In April 1848 Edward Kilshaw lodged a claim against the LNWR as a result of damage caused to his soap manufactory on Gascoyne Street. He was compensated to the tune of £126. It was around this time that the LNWR was forced to apply for an extension to its compulsory land purchase powers.
By circumstance or design, the tunnel had become two separate structures – the western part (852 yards) being named Waterloo whilst the longer section eastwards (2,706 yards) earned the title Victoria. By January 1849 the route was almost through and the first goods traffic travelled it in August. But in a final act of defiance, a three-foot section of Victoria Tunnel collapsed in September 1852.
From Waterloo Dock, wagons were taken by locomotive as far as Byrom Street cutting, encountering falling gradients of 1:86 for 217 yards, 1:139 for 400 yards and 1:513 for 251 yards. From there it was a stiff climb all the way to Edge Hill, rising at 1:57 until a point close to the east portal where it eased slightly to 1:72. Approximately 26 feet across, the tunnel could accommodate wagons 9 feet wide and 13 feet 3 inches high at their centre.
The Electric Telegraph Company installed wiring through the tunnel, together with bells, magnets and instruments at either end, allowing workers at Byrom Street to communicate with those at Edge Hill where a brick building housed a stationary engine. This drove a continuous rope, used to haul wagons up the incline. At 6,000 yards in length and weighing 18½ tonnes, it was the largest iron wire rope ever manufactured and its supplier, Messrs P & H J Morton, charged the LNWR £830 for it. But the rope broke on 16th February 1895; thereafter locomotives were used throughout.
But no means of conveyance is absolutely failsafe, particularly on such a severe gradient. On 4th July 1899, a goods train consisting of a tank engine, 23 loaded wagons and a brake van became divided when a coupling between the seventh and eighth wagons fractured. The rear portion ran back into the self-acting runaway catch points at Byrom Street. Two wagons and the van were destroyed when they smashed into the portal of Waterloo Tunnel, killing two of the three men aboard. A train travelling towards the docks collided with the debris and partly derailed.
Having previously been a conduit only for freight, 12th June 1895 saw passenger trains introduced to the tunnel, using it to reach the now-demolished Riverside Station via the Mersey Docks & Harbour Board’s railway. But the terminus entered a steep decline during the 1960s and saw its last services in February 1971. By then, docks traffic had dried up and the tunnel officially closed on 19th November 1972, although a section of the Up line was retained as a headshunt. It is still used occasionally.
Victoria’s east portal features a rusticated arch flanked by buttresses, together with a modillioned cornice and ashlar-coped parapet. It has been Grade II listed since June 1985. The first 200 yards is brick-arched; thereafter the tunnel is unlined (except for occasional patch repairs or supporting brick columns) to just beyond the fourth ventilation shaft, around 1,010 yards in. The headshunt extends about 600 yards into the tunnel. A ground position signal remains in situ, together with an audible warning device on the approach to it.
Five shafts open into the tunnel – these are around 300, 560, 800, 990 and 2,150 yards from the Edge Hill portal. The latter is built into the Down-side wall whilst the others are along the centre line. All reflect the tunnel’s shallow depth and have surface structures of assorted dimensions. At least five hidden shafts exist – approximately 1,350, 1,520, 1,680, 1,900 and 2,420 yards from the east end. One of these is marked by signage. Throughout, large iron chainage markers are attached to the wall at a high level; there are also mileposts in situ.
West of the fourth shaft, a brick arch is added with intermittent vertical brick side walls. Where still exposed the stratum is generally pink sandstone which lies in a north-south ridge through the city. Refuges were fashioned in both walls as well as two bothys on the Down side, providing storage space for track gangs and a place to rest. The larger of these is close to the Byrom Street portal.
A drain runs down the middle of the tunnel but this has collapsed in places, resulting in some standing water. Whilst there are also accumulations of calcite on the brickwork, the structure is generally dry and in reasonable condition. There is however a slight flattening of the arch close to the midpoint; a series of 28 steel brackets has been attached to the crown in this area.
The west entrance forms part of the end wall to Byrom Street cutting. A little over 50 feet wide, this accommodated two running lines and two sidings, as well as having rooms cut into the side walls, presumably used by those marshalling wagons when the incline was rope-worked. Locomotive watering facilities were provided here together with gas lighting, allowing operations to continue around the clock. The cutting – which suffers extensively from fly tipping – is spanned by a single-arch skew bridge, constructed in brick, which formerly carried Hodson Street. A more contemporary building shelters beneath it.
In 1972, as plans were being developed for the Merseyrail network, a proposal was made to use part of the tunnel to create a connection to the low-level Liverpool Central Station. Known as the Edge Hill Spur, it would have created two smaller loops from the city’s Outer Rail Loop, reducing journey times. The project failed due to budget constraints and some local opposition. Attempts were made to revive it in 1985 and again in 2007 by Merseytravel, driven by plans to redevelop the north shore area.
Victoria Tunnel remains in the custody of Network Rail and is subject to its structural maintenance regime.
(Irate’s photos are used under this Creative Commons licence.)
June 2009
Victoria Tunnel
Tidenham Tunnel
The approach cutting to the diminutive northern portal has a vertical rock face as its east wall.
(Photos 1 & 4 © Irate)
Proposals for the Wye Valley Railway, linking Chepstow and Monmouth, were developed in 1865 and the associated bill was presented to a House of Commons committee in July 1866. At this time, the intention was to construct a line mostly on the Welsh (west) bank of the Wye, passing through the village of Tintern. This route presented considerable engineering difficulties, crossing the river and penetrating a ridge before making a junction with the South Wales Railway to the north-east of Chepstow.
S H Yockney & Son of Westminster were appointed as engineers and estimated the cost of constructing the 14½-mile route at £222,298. The steepest gradient would be 1:71 for six furlongs through two tunnels.
Two miles south of Tintern, southbound trains would be launched over the river on a viaduct before disappearing into the first tunnel, heading straight through the rock for 249 yards before emerging onto another viaduct, clinging to the vertical cliff face. After about 150 yards, the line would enter the second tunnel, curving to the east for 715 yards.
Parliamentary authority for the line was granted on 10 August 1866, but to no avail. The financial bubble around railway schemes had burst (not for the first time), with banks collapsing and investors left destitute. The proposal – along with others earmarked for this phase of railway mania – was put on the back burner.
In 1872, a revised route was agreed that crossed the Wye east of Tintern and ran south on a ledge cut into the steep slope on the English (east) bank. The minutes of a board meeting suggest a belief that this would be “probably more economical” and easier to construct. There had also been some opposition to a line through Tintern, passing very close to the historic abbey.
However the Duke of Beaufort was not pleased with this change; he had been supportive of the railway and allowed his land to be used for two-thirds of its route. He favoured a line through the village and insisted that a goods branch must be constructed to serve the wireworks there. This was authorised on 14 June 1875 by means of the Wye Valley Railway Amendment Act.
Construction work on the main line had got underway at Tintern on 26 May 1874, Messrs Reed Bros & Co being appointed as the contractor. The greatest engineering feat – a lengthy single-track tunnel – would be driven beneath Offa’s Dyke and a ridge mostly comprising limestone.
A construction shaft was sunk around 490 yards from the tunnel’s northern end; this was subsequently retained for ventilation and is mostly unlined. In February 1875, the Engineer’s Report informed shareholders that a second shaft had been excavated to expedite the work. This is thought to be 320 yards further south at a point where a spoil heap was recorded on historic maps. The tunnel is wet at this location.
In driving the tunnel’s heading, miners benefited from the use of Ingersoll rock drills, powered by compressed air. These significantly increased productivity, achieving a rate of six feet per day, allowing construction to be completed in just under 20 months.
Inevitably, the high-risk work brought many casualties, some of them fatal. William Escott, 26, was taken on to drive the horses used to haul materials along the contractor’s wagonway. On his first day in the job, one of the animals broke loose and he chased after it, but was knocked down across the track and a loaded wagon ran over him, shattering both thighs and suffering internal injuries. Faint hopes were entertained for his recovery.
But perhaps the most tragic series of events befell the Pidsley family. On 1 December 1874, Peter Pidsley – working in the heading with three others – was attempting to extricate a one-ton piece of rock with crowbars when it slipped and fell on him, resulting in instant death. He left a wife and four children.
In February 1875, four men were engaged in blasting operations in the tunnel when a charge detonated unexpectedly, severely injuring them all. Thomas Pidsley – whose wife, Elizabeth, had died shortly after their arrival in Chepstow – suffered head and facial injuries, lost an eye and had his armed amputated; he was laid up in the workhouse for three months. Then, in February 1876 – having returned to work – he fell across the wagonway and was run over, breaking one leg in three places below the knee and injuring the other.
The Wye Valley Railway was inspected by Colonel Rich for the Board of Trade on 29 September 1876, although the northern part of the line had been used by freight trains since June. The full route was officially opened on 19 October 1876, but the public service was not inaugurated until 1 November. Construction cost a little over £318,000.
As built, Tidenham (or Denhill) Tunnel extended for approximately 1,129 yards and was separated from a second tunnel of 26 yards at its south end by a short cutting. This was subsequently arched over and infilled to create a single tunnel of 1,188 yards, probably between 1900-1920. The keystones of the intermediate portals remain embedded in the arch.
The tunnel curves at both ends, to the west at the south end on a radius of approximately 35 chains, and to the east at the north end on a 25-chain radius. Its gradient is 1:100, falling to the north.
It is believed that, on opening, the tunnel was substantially unlined – the limestone being self-supporting – apart from short sections at both ends where the depth of cover was reduced. An arch was subsequently constructed through much of the southern half, supported by stone piers and brick arches. Discrete collars of brickwork have also been inserted at various locations, presumably after inspections identified fractures in the rock and the possibility of material falling onto the track.
Passenger services were withdrawn from the line on 5 January 1959, but goods trains ran until 4 January 1964. Tintern Quarry traffic continued to pass through the tunnel until December 1981 and the last train on the line headed south from Dayhouse Quarry, Tidenham, to the junction in September 1992.
Reopening of the railway as a tourist attraction has been proposed by enthusiasts, but there seems little prospect of this happening. Sustrans earmarked the trackbed for reuse as an active travel route in 2006 – part of its ambitious Connect2 programme – but the scheme was dropped due to problems obtaining planning permission.
A new scheme emerged in 2019, promoted by a charity, Greenways and Cycleroutes. Work to deliver the Wye Valley Greenway saw the extent track removed from Tidenham Tunnel in the summer of 2019 and tarmac laid in September 2020. Later that month, volunteers attended a workcamp to install 132 lighting units, brick up seven recesses to encourage bat use and fit a protective shield below the shaft.
The tunnel welcomed its first visitors on 1 April 2021 and will remain open every year until the end of September. To comply with planning restrictions, the tunnel will close during the winter months to allow bats to hibernate undisturbed.
January 2012
AAccess risks
FFall/trip hazards
LLining condition
UUnderfoot conditions
VVentilation risks
Tidenham Tunnel
Thackley Old Tunnel
Architecturally blessed, the west portal has real presence although vegetation growth is now conspiring to mask it.
(Photo 14 © Bill Blair)
Promoted by a group of Bradford businessmen and chaired by George Hudson, the Leeds & Bradford Railway was incorporated in July 1843 following the granting of Parliamentary approval for a line entering Bradford from the north, terminating at Market Street Station, now known as Forster Square. The Leeds end was at Wellington Street.
Engineered by George Stephenson, the route’s flagship feat was a tunnel of 1,496 yards (132 yards longer than planned) through a spur of land called The Nosegay. It measures 24 feet wide by 20 feet high and follows a broadly east-west alignment, incorporating a curve to the south at its western end. Contracted to build it were Messrs Nowell and Hattersley. The tunnel was driven from seven shafts, about 250 yards apart, the deepest of which was 252 feet. Two disappeared as the approach cuttings were excavated; the other five were retained for ventilation and four remain open today.
Work on the tunnel finished in May 1846. Over the preceding three years, several navvies lost their lives. Amongst them were William Hervey, 39, who got his foot entangled in the winding gear at one of the shafts and was mangled to death in May 1845; an unnamed labourer was killed when he fell down a shaft one month later; James Horatio Bishop, aged 19, was buried by a fall of earth at No.4 shaft in September 1845; miner John Stephney was crushed when a stone fell on him in January 1846.
Following the tunnel’s opening on 30th June 1846, passengers in the open carriages complained of the soaking they received as a result of water penetrating the lining.
In 1853, the line was absorbed by the Midland Railway. As a result of its success, quadrupling of the route took place in 1900, necessitating the driving of a second bore to the north side of the original.
Thackley Old Tunnel was deemed surplus to requirements in 1968, coinciding with closure of the GN’s branch from Shipley to Laisterdyke via Idle and Thackley. In the 1970s, about 80 yards of its middle portion was backfilled by British Rail due to severe distortion of the lining. However this also had an impact on maintenance workers who used it for vehicular access along the track.
The portals are impressive stone-built affairs, with substantial voussoirs and attractively masoned copings. Triangular wing walls extend outwards, parallel to the trackbed. Ovoid in profile, the lining comprises masonry sidewalls and a brick or stone arch. Brick-backed refuges were provided for the benefit of the line’s platelayers.
Click here for more of Phill’s pictures.
November 2023
AAccess risks
FFall/trip hazards
LLining condition
UUnderfoot conditions
VVentilation risks
Thackley Old Tunnel
Scotland Street Tunnel
With its radiating voussoirs, the tunnel's north portal - the only one remaining - looks out onto a children's play area.
(Photos 5-8 © Phill Davison, photo 9 © RCTS Photographic Archive)
Authorised by Parliamentary Acts of August 1836 and July 1839, the Edinburgh Leith & Newhaven Railway inaugurated its 1¼-mile horse-drawn service from Canonmills to Newhaven on 31st August 1842, establishing a passenger and goods link between the city and a port on the south bank of the Forth.
Following a name-change to become the Edinburgh Leith & Granton, the line was extended to reach a new harbour at the latter named place in 1846 and a branch to Leith opened two years after that. 1847 brought two significant developments: horse power gave way to steam and services were pushed deeper into the city by means of the 1,007-yard Scotland Street Tunnel.
This was an undertaking of very considerable scale and complexity as it had to be driven beneath a thoroughfare that ran northwards from Princes Street, through the New Town to the reach the terminus at Canonmills. To allay fears regarding the impact of the works on adjacent properties, Edinburgh’s Sheriff appointed respected civil engineer George Buchanan to oversee the works on the city’s behalf. Thomas Grainger looked after the engineering for the railway company whilst William Paterson acted as resident engineer.
Work on the tunnel got underway in earnest early in 1844 with the sinking of five construction shafts. At 88 feet in depth, the first to be sunk was located outside the National Bank in St Andrew Square, 165 yards from the south portal. No.2 shaft, 89 feet deep, was 207 yards further along North St Andrew Street. Located at the top of Dublin Street, No.3 shaft was sunk to a depth of 59 feet. About half-way down was No.4 shaft, 48 feet in depth. And on the south side of Drummond Place was the most northerly shaft, just 39 feet deep.
Six-feet square headings were driven outwards from the bottom of these shafts, progress with which proved quite speedy. Early on the morning of 29th November 1844, two miners were working at the face of the heading to the south side of No.3 shaft, their aim being to affect a junction with the heading from No.2 shaft, the contract for which had been completed seven months or more earlier. With no work taking place therein, it had filled with water.
Unbeknown to the miners, the direction of their heading had been incorrectly surveyed, such that it was passing to the east side of the one it was intended to meet. Between them and the huge volume of water was a narrow partition of clay. At about six o’clock, the men’s ganger and superintendent arrived to check on progress. About half-an-hour later, a great roar was heard by those above ground, followed by a powerful surge of water which fiercely struck the roof of the shed enclosing the shaft top. All four men perished and floods engulfed properties as far north as the Canonmills terminus, 500 yards away.
Contracts for excavating and lining the southern section of tunnel were awarded to John Barr & Co early in 1845. By March, the tunnel was complete from the south end to a point beyond No.1 shaft, with rapid progress being made elsewhere. Three months later, the only parts yet to be finished were between Nos. 2 and 3 shafts, and to the north of No.5 where a ridge of whinstone was hampering operations.
The northern portion, extending for about 250 yards beneath Scotland Street, was built under a separate contract by cut and cover methods due to the sandy nature of the ground, although there is evidence that attempts had been made to sink one or two shafts here. The work involved progressively excavating the roadway to a depth of about 40 feet, inserting the lining and then reinstating the ground. To facilitate this, the old Custom House in Drummond Place had to be demolished. June 1846 brought this phase to its completion. Structural work on the bored tunnel was concluded in September; Captain Coddington carried out an inspection for the Railway Board in April 1847 and the tunnel opened on Monday 23rd May.
Scotland Street Tunnel measures 24 feet wide, rising towards Princes Street at 1:27. The severity of this gradient meant that traffic had to be hauled up to the new terminus at Canal Street on an endless rope. Mr Hawthorn provided a stationary engine for this purpose. Trains heading down to Canonmills were arrested by brake wagons. On 4th June 1847, after less than two weeks operation, the rope broke and services through the tunnel were suspended for ten days.
The Edinburgh & Northern Railway took control of the Edinburgh Leith & Granton on 27th July 1847, with the North British assuming control in 1862. It established a link into Waverley (then known as North Bridge) Station six year later and brought closure of the route through the tunnel to passengers. Scotland Street depot at Canonmills continued to serve goods and mineral traffic which arrived from the north.
During the Second World War, the tunnel was returned to funtionality, acting as an air-raid shelter for 3,000 residents of central Edinburgh and the London & North Eastern Railway’s emergency headquarters and command centre. For this latter purpose, a collection of brick and timber buildings were erected against the west sidewall, with communication links provided to key railway facilities – stations, depots, signal boxes and the like. Toilet blocks and blast walls were also built.
Peacetime brought further activity in the tunnel. It hosted a mushroom farm in the Seventies and was subsequently taken over by a car dealer to store vehicles. More recent proposals for its reuse have included the installation of a power generation plant and incorporating it into an Edinburgh Metro network. None has been progressed.
The north portal of the tunnel, now fenced up, looks out onto a park and play area. In keeping with other portals on the line, it features long rusticated voussoirs tapering outwards to meet ashlar buttresses. Beyond these are retaining walls, all topped by a string course beneath ashlar coped parapets.
At the north end where cut-and-cover methods were used, an ashlar lining was erected; brick becomes predominant through the bored section although occasion lengths of ashlar sidewall are encountered. It is clear from the extensive localised mineral deposits that there has been significant water ingress, although the floor of the tunnel is generally dry. A white circular deposit is visible at the crown, probably caused by seepage from a construction shafts. At one location, cracks have opened at both haunches over a length of about 20 feet, resulting in the formation of hinges.
No refuges are provided although, near the south end, there is a single arched entrance on the west side leading into a small unlined chamber. Further north, there is a square opening in the same wall, topped by a decaying lintel. An assortment of furniture – tablets, brackets, timber supports – are attached to sidewalls.
A concrete blockwall has been built about 20 yards from the former location of the south portal, beyond which the surrounding area has been developed. However a gate in the north wall of Waverley Station provides access to a metal tube which leads into the tunnel.
Click here for more of James’ pictures.
Click here for more of K-Burn’s pictures.
August 2013
Scotland Street Tunnel
Sandsend Tunnel
Colourful sandstone contributes to Sandsend's classic single-track portal, although vegetation is doing its best to mask it.
(Photos 1-3 & 15 © James Perry, photos 4-14 © K-Burn)
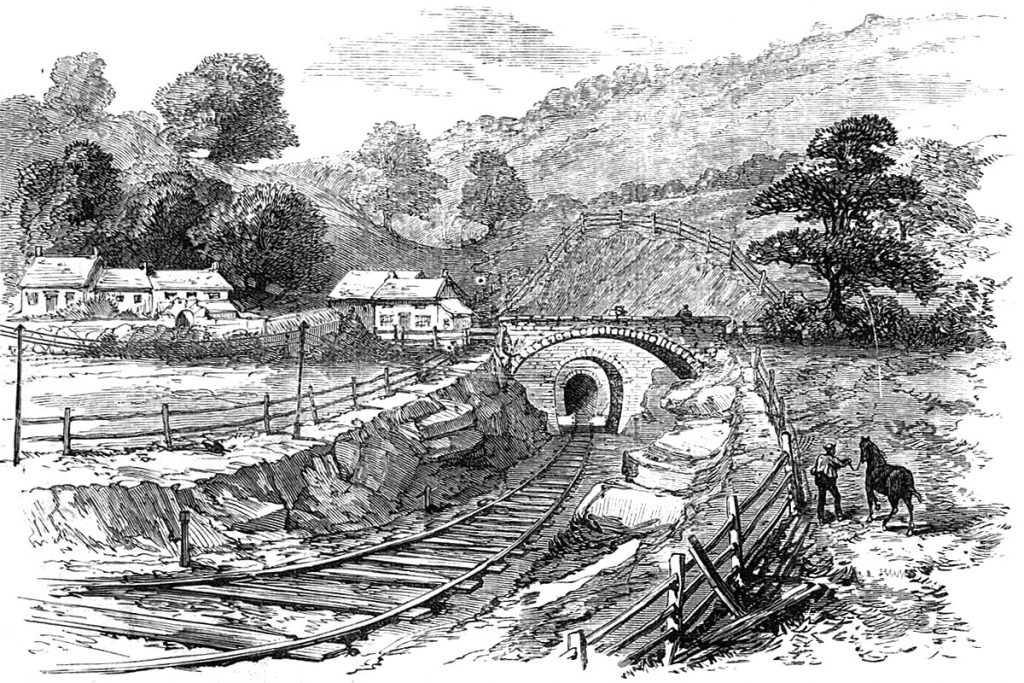
Like its sibling neighbour Kettleness, Sandsend is a tunnel which never should have been. When the Whitby, Redcar & Middlesbrough Union Railway began work on its Loftus-Whitby route in 1871 – five years after obtaining its enabling Act – the plan was to build the line along the edge of the cliffs. Work ground to a halt in 1874 when the contractor went into liquidation; when it resumed under the auspices of the North Eastern Railway, the original formation was deemed too dangerous – some of it having collapsed into the sea – and the track was re-routed via two tunnels further inland. The line opened with little ceremony on 3rd December 1883.
Sandsend, by far the longer of these tunnels, is 1,652 yards in length and was built to accommodate a single line, falling to the south on a gradient of 1:57. It is predominantly straight but the last ~350 yards incorporate a curve to the north of around 32 chains radius. It boasts five shafts, all of which are capped. No evidence of them is visible above ground. Shafts 2 and 4 are of a tighter diameter and were built to service the tunnel’s construction. At their bases are adits which were driven out to the cliff-face, allowing spoil from the workings to be tipped onto the shore for clearance by the sea. The three wider shafts were added in 1900.
The northern portal was always problematic and had been strengthened using rings of bullhead rail. Unfortunately these could no longer take the strain and around 6 feet of the roof collapsed at the portal early in 2008, 51 years after the last train passed through it.
The tunnel is very wet in parts, resulting in spalling of the brickwork, some of which is significant. There is thick orange sludge for about 50 yards to the north of shaft 3. In several places, bulges are apparent in the west sidewall, resulting in fracturing and the potential for a collapse to occur.
(Twiggles’ photo is used under this Creative Commons licence.)
Click here for the tunnel’s full story.
October 2014
Sandsend Tunnel
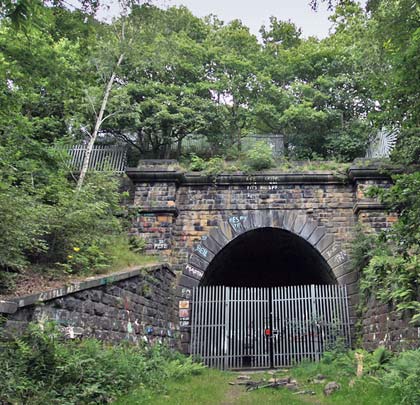
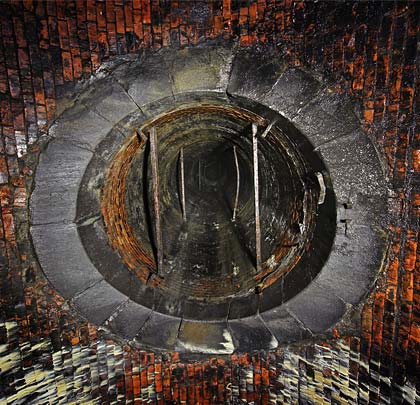
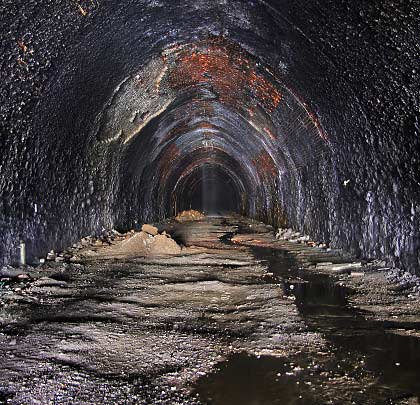
Queensbury Tunnel
The north portal has deteriorated through ground movement and cascading water, resulting in the loss of the parapet.
(Photo 14 © Twiggles, photos 16-17 © Neil Cholmondeley collection)
The Act for a railway connecting Halifax with Keighley, promoted by the Great Northern, received Royal Assent in August 1873. Extending northwards from the Halifax & Ovenden Joint line at Holmfield (which the GN had built with the Lancashire & Yorkshire), it would form a triangular junction with the Bradford & Thornton railway at Queensbury, continuing thereafter through Denholme, Wilsden and Cullingworth to an independent terminus close to the Midland station in Keighley.
The local topography imposed many constraints on the three lines radiating from Queensbury. Several tunnels and viaducts were called for, all a product of John Fraser. Born in Linlithgow in 1819, he was a prolific civil engineer, responsible for numerous lines across Yorkshire’s West Riding including sections of the Great Northern’s main line to London. As a result, he went on to be appointed as the company’s engineer. Fraser established a partnership with his son, Henry, in the late 1870s, their subsequent credits including the GN/LNW Joint line from Bottesford to Melton Mowbray. Fraser Snr died at his home in Headingley in September 1881; his son outlived him by just eight years.
At two miles two furlongs and six chains in length, the Holmfield-Queensbury section – known as Railway No.3 on the plans – would prove disproportionately demanding, and this was reflected in its estimated cost of £179,585. Messrs Benton & Woodiwiss, of Manchester and Derby, were contracted to deliver it. An impressive vertically-sided cutting was excavated at Strines, pushing in an S-shape through the sandstone and millstone grit for 1,033 yards, reaching a depth of 59 feet. This was spanned by a road bridge and aqueduct. At its head was the southern entrance to Queensbury Tunnel which, at 2,501 yards, was the Great Northern’s longest when it first welcomed traffic.
Work on the tunnel had begun on 21st May 1874. Four observatories were erected, from which a view was commanded over each of the construction shafts. Although eight shafts were originally planned, their spacing was subsequently revised and just seven were initially progressed. Shaft No.8 – the northernmost – was the first to be started. The immense influx of water proved a considerable hindrance throughout; the ample pumping provision was almost defeated on several occasions during periods of wet weather. As a result, No.5 and No.6 shafts had to be abandoned when sunk to depths of 266 feet and 196 feet respectively. Of these, the latter was adjacent to Thornton Road, about 2,066 yards from the south portal. Although ultimately to no avail, a driftway – 4 feet square and 120 yards long – was driven out to the hillside from a point 70 feet down the shaft in an attempt to drain the water from it. If finished, it would have been 342 feet deep. But the other shaft was to have been the deepest at 414 feet. This was sited just to the west of New Park Road (then named Kitchen Lane), 1,617 yards from the southern end.
Over the years, rumours have persisted that an additional shaft was sunk, presumably to expediate progress through the northern section of tunnel. If built, there is certainly no sign of it today.Two small apertures in the crown, at around 1,950 yards, have been suggested as its possible location, however consultants working on behalf of the tunnel’s owner, British Railways Board (Residuary), assert that no such shaft was ever constructed.
The remaining five shafts were retained for ventilation purposes. From the south end, these are located at 122 yards (112 feet deep, 9 feet diameter), 399 yards (324 feet deep, 9 feet diameter), 742 yards (379 feet deep, 10 feet 6 inches diameter), 1,165 yards (361 feet deep, 12 feet diameter) and 2,364 yards (125 feet deep, 9 feet diameter).
The shafts passed through coal measures, first encountering the Halifax hard bed (varying from 2 feet to 2 feet 3 inches in thickness) and then the Halifax soft bed (between 1 foot 6 inches and 1 foot 8 inches thick) 20 yards below. The tunnel itself meets one of these beds in the middle and again further north; the predominant strata are sandstone and shale.
A 10-foot square heading made progress from both ends of the tunnel and the bases of the five shafts, making 12 potential faces in total. A three-shift operation was established, with around 20 men per shaft employed on each. At about 3:40am on Tuesday 7th December 1875, six miners returned to their working face after retreating to fire shots, under the impression that all had been successful. They discovered however that one had misfired so Henry Jones and John Gough set about withdrawing it. As they did so it exploded, killing them instantly. Another member of the group, John Rowley, was taken to Halifax Infirmary with head injuries and a broken arm, having been initially tended to by works inspector Mr Albrighton.
On Saturday 10th October 1874, 30-year-old Richard Sutcliffe suffered a fatal compound skull fracture when a rope used to haul a cage up No.1 shaft broke, causing it to freefall to the bottom. Masons Herbert Evans and Thomas Dyson were also struck but survived. In May 1876, miner Richard Jones died when a loose rock collapsed onto him. This pattern of tragedy was repeated during construction of all three routes out of Queensbury, resulting in one newspaper christening them “the slaughtering lines”.
Several types of rock drilling machine were tried in the heading but, whilst a number had proved effective elsewhere, only one was successful here. Major Beaumont of the Royal Engineers – and chairman of the Diamond Rock Boring Company – had developed a machine that was suited to the harder material found at Queensbury. It comprised a frame on which four drills were mounted, with compressed air harnessed as the motive power. In July 1877, it was brought to work from the bottom of No.4 shaft. The rate of progress was three to five times that of manual labour, contributing significantly to the heading’s completion on 2nd October. This event greatly expedited the remainder of the work although, by this time, half the full-sized tunnel had already been excavated and lined.
The following summer brought work to its conclusion and the Great Northern expressed its gratitude by entertaining the 300 men involved to a dinner on 31st July 1878. In late September, a train travelled through the tunnel as part of a preliminary inspection. Major General Hutchinson conducted his examination for the Board of Trade on Wednesday 9th October, deeming railway No.3 unfit for passenger traffic due to the incomplete nature of the works. And so it was a freight only line when the first train enjoyed the 1:100 gradient, descending towards Halifax, on 14th October 1878. Passenger services were eventually introduced in December 1879, after Hutchinson had revisited.
Soon after it opened, significant defects were detected in the sidewalls, partly as a consequence of poor workmanship but also the mining of coal from a seam immediately adjacent to the tunnel. As a result, January 1883 brought the introduction of single line working over the Down (southbound) line, allowing repairs to take place on the west sidewall. The situation was reversed after 12th May and the work was fully completed in September. As it was regarded as a construction fault, Benton & Woodiwiss were required to bear the cost of carrying out the repairs.
In 1890, operators of the local mill, John Foster & Sons, obtained the Great Northern’s permission to extract water from the abandoned No.6 shaft at Sharket Head, although it’s not known whether these rights were ever exercised. A similar arrangement relating to No.5 shaft was agreed in December 1934, resulting in the installation of a pump and equipment to facilitate the shaft’s inspection.
The Home signal for Up (northbound) trains was located just outside the tunnel; the Up Distant was about 400 yards inside it. With locomotives belching out smoke as they laboured up the gradient, the signal proved easy to miss so a mechanical gong – fabricated at the GN’s Doncaster works – was installed 50 yards in rear of it. This was operated by wheel flanges striking a treadle fixed in the four-foot which, in turn, worked a hammer that hit a flat metal plate.
In periods of cold weather, huge icicles could form which would be collected in the tender of the first train through on a morning. These could pose something of a hazard to those on the footplate. Engines were sometimes left in the tunnel overnight, generating heat to prevent their formation.
During 1933, it became apparent that the ground water percolating into No.3 shaft was causing significant deterioration of the brickwork. The Works Committee decided to strengthen and reline it, inviting 13 contractors to tender. Seven responded – although the documentation was incomplete in most cases – with quotes ranging from £2,600-£3,800; proposed timescales were 13-50 weeks. Using materials supplied by the LNER, G A Pillett & Son was engaged to fulfil the project in January 1934, taking seven months and charging £2,637 for their troubles.
The line’s passenger service was withdrawn on 23rd May 1955. Freight continued until the following year, ending on 28th May. Lifting of the tracks took place in 1963.
Soon after, a seismological station was established in the tunnel – codenamed QMB – allowing a number of research projects to be developed. In 1973, two Cambridge University scientists, Dr G King and Mr D Young, used an array of strain meters and seismometers to compare the effect of elastic inhomogeneities on surface waves from earthquakes and tidal strains. The recording equipment was housed in a hut which members of the university’s geophysics department sometimes slept in. Access involved driving through the tunnel in a van, dodging the rubble that had been tipped down the shafts when they were capped. The station closed in November 1979 due to safety concerns. The apparatus was resited to Bingley although some metal shelving still survives.
Until recently, the tunnel’s northern entrance had been bricked-up, with maintenance access available through steel-plated gates. This arrangement was replaced with a palisade fence following a programme of repair works in 2012. The southernmost half-mile is flooded, reaching roof level at the portal as a consequence of the falling gradient. This accumulation was prompted by the infilling of Strines cutting and the failure to provide a drainage outlet. However pumps have been used to draw off the water when access is required for maintenance.
Annual inspections of the tunnel, structure number HQU/3D, had ceased due to the condition of the lining and low levels of oxygen. Limited structural repair work in 2011 allowed inspections to resume, but there remains a considerable amount of bulging or missing brickwork, particularly at the haunches. A major works programme will be undertaken to address the major defects over the next four years.
26 feet wide and 21 feet from rail level to the crown, the tunnel comprises vertical masonry sidewalls and a brick arch, although a stone arch is used close to the portals and around some of the shafts. No refuges were initially provided, but six were inserted on the Down side and eight on the Up as part of the 1883 sidewall works. Cable hangers remain in situ, neatly negotiating the refuges; there are also some pulleys for signalling wires.
Water ingress, particularly from the northern shaft (No.8), remains considerable. During the tunnel’s operational period, this was managed via a drain located in the six-foot and accessed via catchpits. Several of these remain today but with their lids missing.
The north portal is in a poor state, with open mortar joints and bulging stonework. The parapet was lost in the 1980s and the wing walls have almost gone. This deterioration is ongoing, driven by ground movement, the effects of vegetation and cascading water. Much of the south portal is obscured by a landslip but draining of the floodwater recently revealed it to host an array of telegraph insulator pots and a pair of substantial pattress plates, as well as rounded voussoirs and copings.
National Highways, the structure’s custodian on behalf of the Department for Transport, applied for planning permission to abandon Queensbury Tunnel in 2019. The works would involve infilling the shafts and sections of around 130 yards extending inwards from the portals. Thousands of people have objected as the works would block proposals to repurpose the tunnel as part of an active travel route connecting Bradford and Keighley with Halifax which was identified as presenting high value-for-money in a feasibility study carried out by Sustrans.
July 2014
AAccess risks
FFall/trip hazards
LLining condition
UUnderfoot conditions
VVentilation risks