


Walton-on-the-Hill tunnels
Walton-on-the-Hill tunnels

In 1873, the Cheshire Lines Committee obtained a large parcel of land within the developing docks complex at Huskisson – north of Liverpool – with the intention of building a goods station there. To reach it, two possible routes were considered, one under the city centre and a second running for seven miles around the east side of Liverpool, diverging from the CLC’s main line at Halewood. At an estimated cost of £600,000, the latter was by far the cheaper option and Parliamentary approval for it was granted in an Act dated July 1874. Also stipulated was the split of income between the three contributing companies – the Midland, Great Northern and Manchester, Sheffield & Lincolnshire railways.
From a triangular junction at Fazakerley, one leg headed north to Aintree – later extended to Southport – whilst another turned south-west towards the docks. Collectively these formed the North Liverpool Extension Lines and were progressed under the auspices of Messrs Kirk and Parry, the contractors.
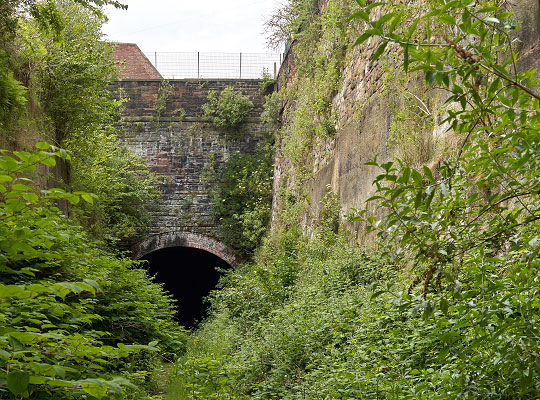
Work got underway in September 1875 and proved generally light. However the section down to Huskisson presented considerable challenges with three tunnels having to be driven through sandstone, separated by vertically-sided cuttings. These were encountered after passing through the station at Walton-on-the-Hill and formally took that name.
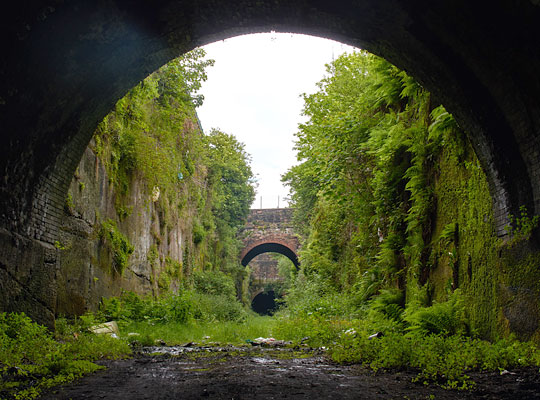
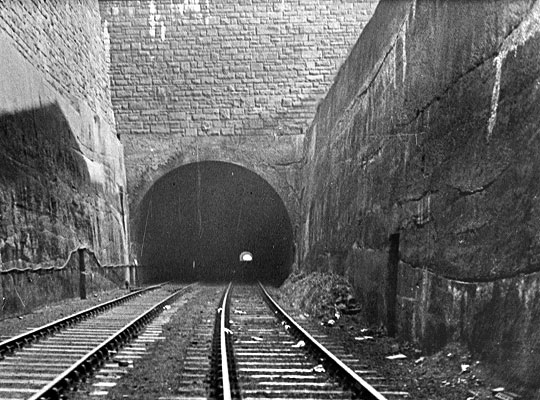
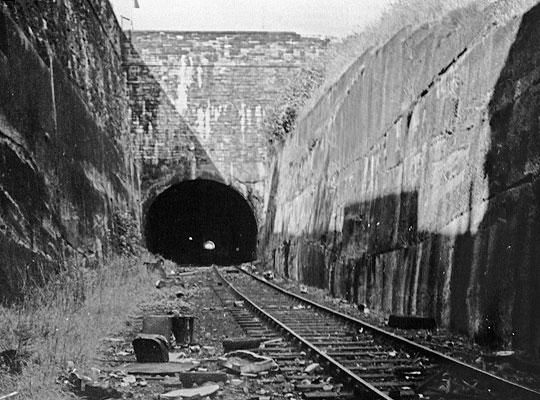
The first (HUS/40) passed beneath Breeze Hill, extending for 229 yards and emerging into a deep cutting, 143 yards in length, which was spanned by Liston Street bridge. At 643 yards, the longest of the three tunnels (HUS/42) pushed the line under Bedford Road. Daylight was restored by another cutting of 70 yards before a 247-yard curved tunnel (HUS/43) intervened, the line finally materialising alongside Kirkdale Station on the Lancashire & Yorkshire route to Wigan/Bolton.
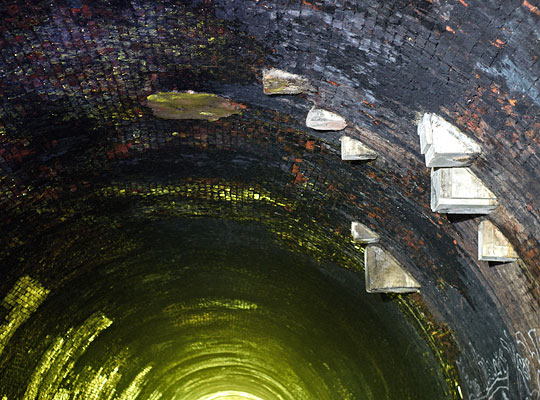
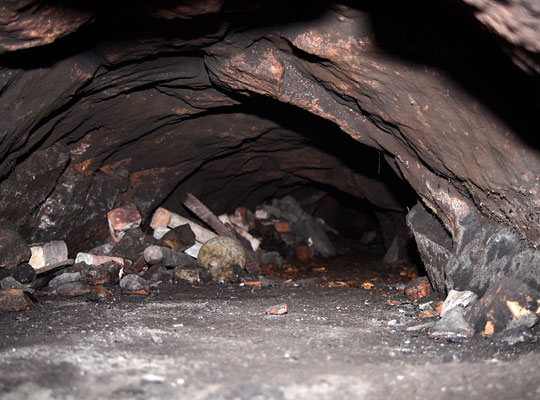
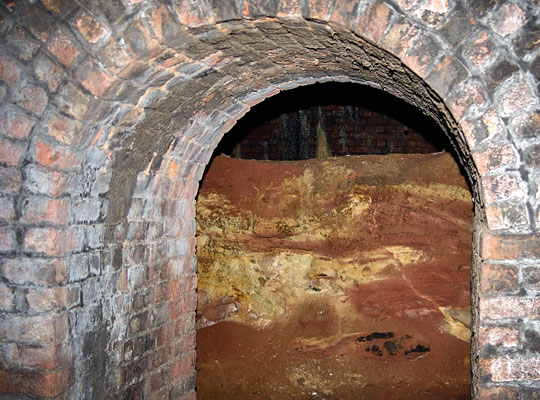
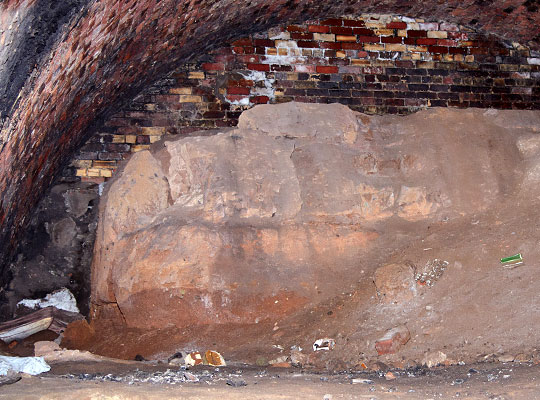
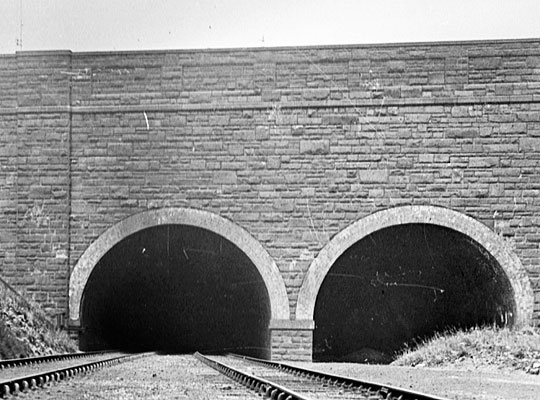
It was intended from the outset that the docks spur would eventually accommodate four tracks – such were the anticipated traffic levels – although only two would be laid initially. To that end, work was begun on parallel bores, resulting in two separate chambers being excavated on the south-east side of No.1 tunnel, whilst most of No.3’s second bore was also progressed. These workings were accessed through archways in the sidewalls of the completed tunnels.
The line opened as far as Walton-on-the-Hill Station on 1st December 1879. A delay in completing the tunnels meant goods trains could not run through to Huskisson until 1st July 1880. Passenger services were soon introduced but these attracted little interest and were cut back to Walton-on-the-Hill five years later. The line suffered considerable rationalisation in the 1960s and officially closed on 17th June 1975. Track lifting took place in 1979/80.
When Merseyrail was developed in the 1960s, an Orbital Outer Rail Loop was proposed, connecting outlying suburbs with radial routes into the city centre. Initial plans for this line included use of the tunnels at Walton-on-the-Hill. These were however substituted in later versions of the scheme for the North Mersey Branch between Aintree and Bootle.
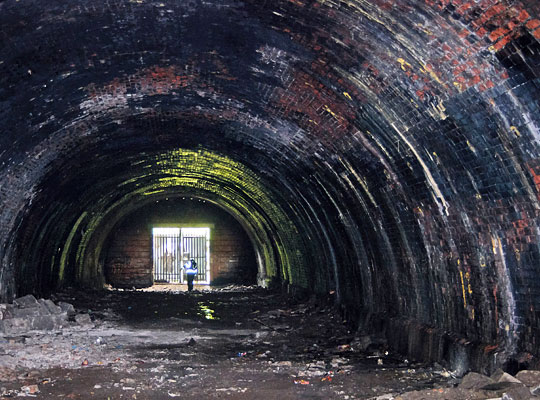
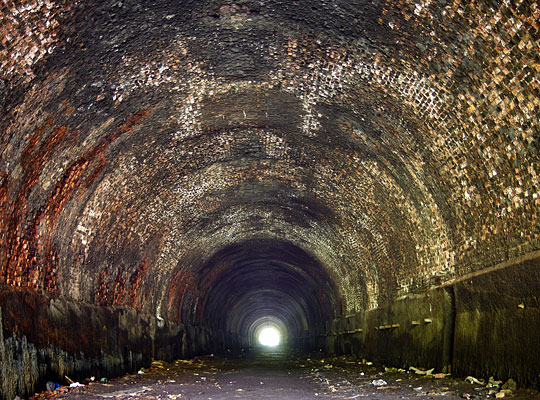
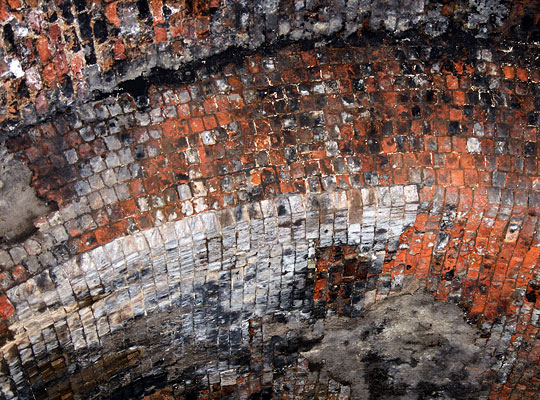
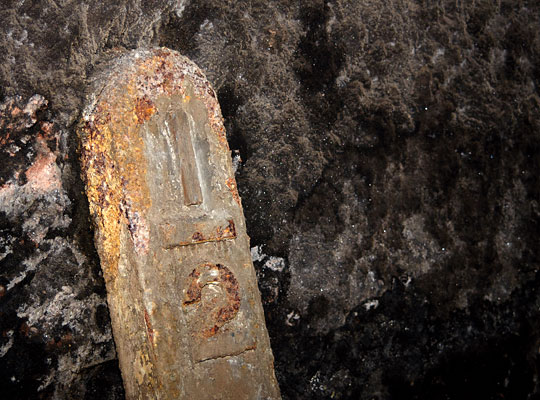
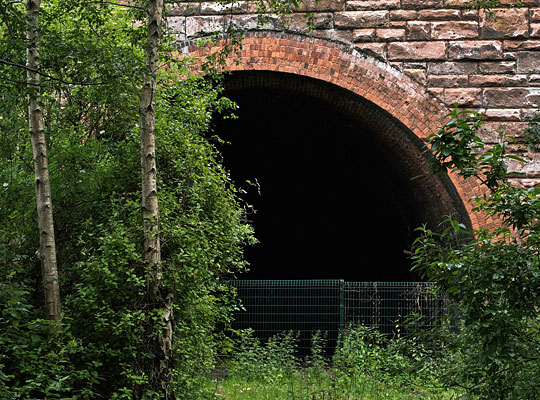
A blockwall now protects the northern entrance to No.1 tunnel, incorporating palisade fencing clad with steel sheets. Inside, the floor is now higher than it was prior to closure, possibly a function of drainage improvement works. The lining comprises a brick arch springing off ledges cut into the sandstone, sharing this characteristic with many of Liverpool’s tunnels. About 100 yards in, the brickwork is penetrated by several concrete beams which support one of the piers for the Queen’s Drive flyover. Whilst generally dry, it is clear that many patch repairs were required during the tunnel’s operational period.
The first section of uncompleted bore is entered through the third refuge on the left; this again has rock sidewalls and a brick arch, but ends abruptly at sandstone faces. The brickwork quality is poor, with an excessive amount of mortar used on the outer ring. A second chamber is located near the south end of the tunnel. At the minimalistic south portal, the arch ring face has benefited from repairs in both red and blue brick. Immediately above is exposed rock upon which stands a two-stage retaining wall.
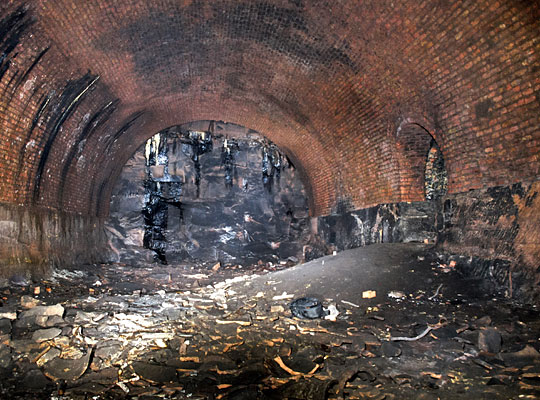
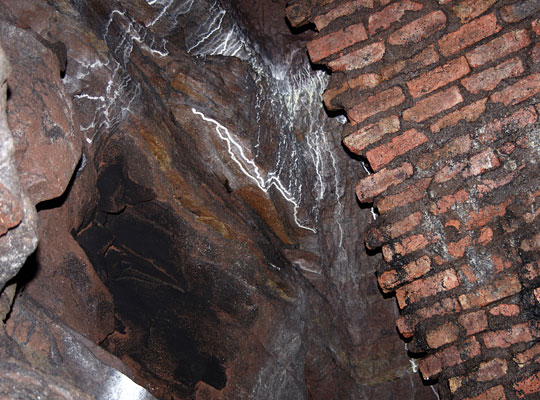
Former trackbed level is restored through No.2 tunnel. Either side, the carefully-worked rock sidewalls reach a height of about 7 feet and accommodate refuges as well as a row of wooden cable hangers. A single timber sleeper – complete with its chairs – evaded the salvage teams. At one location, a change in section reveals the arch to comprise ten brick brings which, given the geology, is presumably a local anomaly: it is only five bricks thick at the south portal. Water penetration has caused extensive spalling in places.
No.3 tunnel follows a curved alignment and, for most of its length, its uncompleted neighbour follows alongside it, accessed via the south portal and two openings in the sidewall. In this bore, a sandstone ridge – about six feet high – runs down the middle, with only the sides and upper part fully excavated to allow construction of the lining. At the south end, the portal accommodates two entrances, with a substantial stone headwall and parapet above.
The cuttings between the tunnels are overgrown and attract substantial quantities of domestic detritus, tipped from the adjacent streets. In 2011, this was sufficient to block the south end of No.2 tunnel, although it has since been cleared and mitigation measures installed on top of the cutting.
Click here for more of Kyle’s pictures.

 June 2017