


Hawthorns Tunnel
Hawthorns Tunnel

Proposals for the Mitcheldean Road & Forest of Dean Junction Railway first emerged in 1871, the intention being to link communities north of Cinderford with the Great Western’s Gloucester-Hereford line via Ross-on-Wye. Effectively an extension of the Whimsey branch, it was a relatively modest scheme at only 3¼ miles in length.
Construction was blighted by contractual disputes and, in August 1878, works were at a standstill. With the company unable to raise sufficient funds to restart them, the GWR intervened, authorising £20,000 of expenditure on top of its original investment which allowed new contracts to be let. By the summer of 1880, the line was substantially complete and its full transfer to the Great Western took place on 6th August.
The Severn & Wye Railway’s branch through Lydbrook opened in 1874, establishing a route from Cinderford to Ross. This was likely a contributory factor in the GWR’s unusual decision not to open the route despite it being ready for traffic. The need to complete expensive modifications at Micheldean Road Station might also have had an influence.
The southernmost mile of line did become operational in 1885 when trains started to serve a goods station at Speedwell. The terminus was extended further north in 1907 with the introduction of a railmotor service between Newnham and Drybrook Halt, but this was withdrawn after just 23 years. Although the track northwards was lifted in 1917, it was relaid as far as Drybrook Quarry in 1928 and to sidings serving the Admiralty in 1939. The branch succumbed to closure in February 1953, the track being removed once and for all in 1957.
From Micheldean Road, the line climbed a stiff ruling gradient of 1:40 to reach its summit at Hawthorns Tunnel, driven under Euroclydon House which provides the structure with its alternative, unofficial name. A little further south at Drybrook is a shorter tunnel of 97 yards, on the descent towards Cinderford.
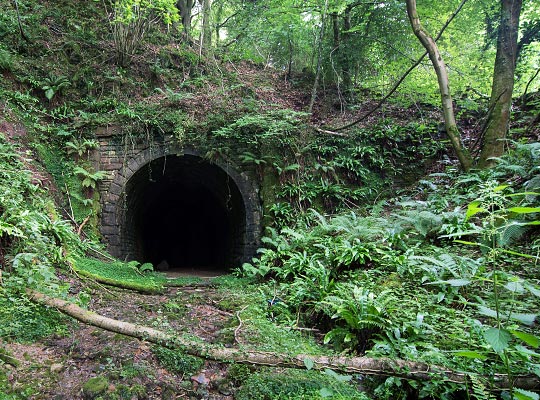
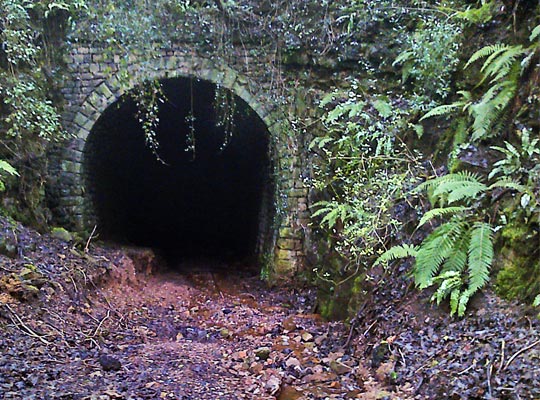
Hawthorns Tunnel hosted the single track for 638 yards, following an S-shaped alignment. Beyond the north end, the line was cut into a steep valley side before curving eastwards into the approach cutting. Built in stone, the portal is asymmetrical, with a long triangular wing wall on one side but only a buttress on the other. Ferns and mosses now obscure much of the structure.
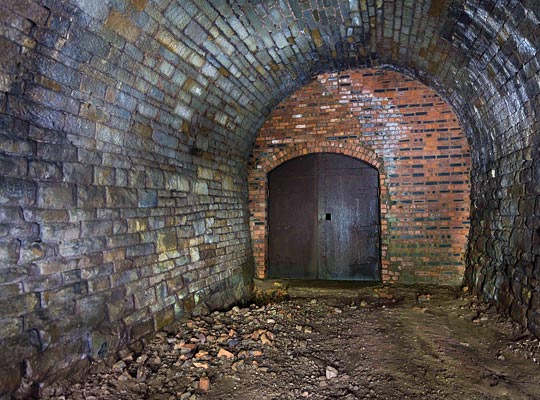
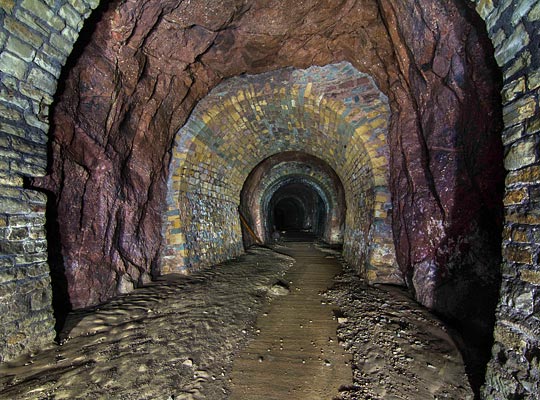
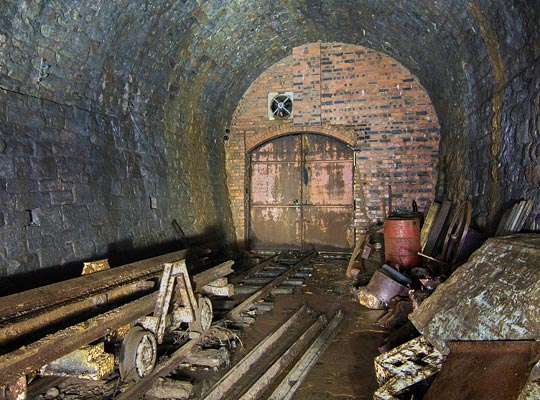
Just inside the open entrance is a brick blockwall with a pair of steel doors, preventing access into the main part of the tunnel. The lining is stone: rubble-faced up to springing level, but dressed above. Within 6-10 feet of the portal, the arch is separating transversely, particularly at the west-side haunch.
Towards this end of the tunnel, pink Tintern Sandstone is revealed between discrete collars of stonework. The layering of the rock is most striking in the largest of the unlined sections. Beyond this to the south, the lining is largely unbroken as interbedded mudstone and limestone of the Avon group is encountered. The profile and alignment of the tunnel is quite variable which is perhaps indicative of constructional difficulties. There are no open shafts but, given the tunnel’s length, one or more hidden shafts cannot be ruled out.
Refuges are provided in both sidewalls; some are built in stone, others in brick. At one point, an opening provides access into a chamber which presumably would have been used by the platelayers as a rest room and storage facility had the line ever opened. This space is wet inside, contrasting with the rest of the tunnel which is predominantly dry.
In 1892, whilst still awaiting its first train, a surveyor recommended that the tunnel be used as the water supply source for the nearby community of Ruardean Hill. The average flow was recorded at 175,000 gallons per day, with a minimum of 115,000.
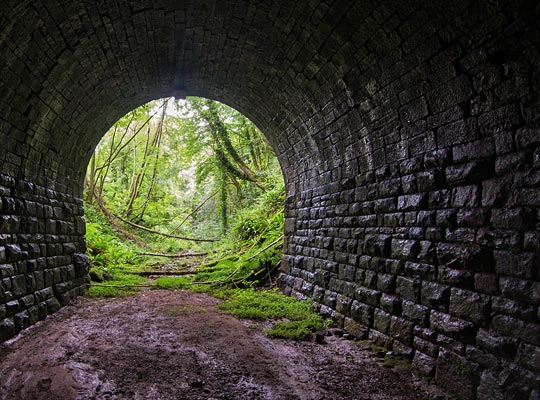
Close to the south end, the arch is built from rubble-faced stone. At the haunch on the east side is an extant row of cable hangers. Another brick blockwall has been erected a few yards in from the entrance, again with double doors. The portal here is also quite humble, pushed in between the exposed rock faces at either side of the cutting.
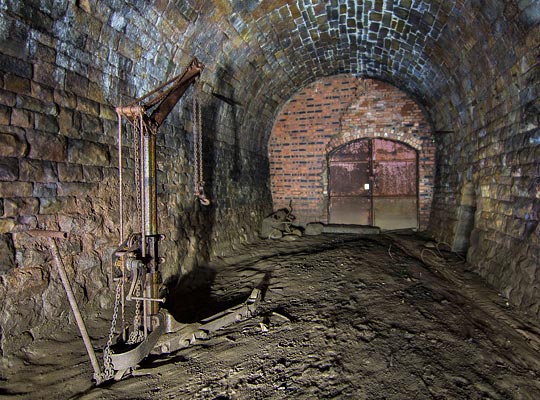
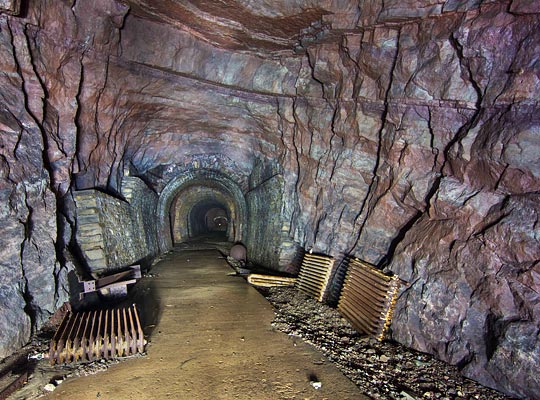
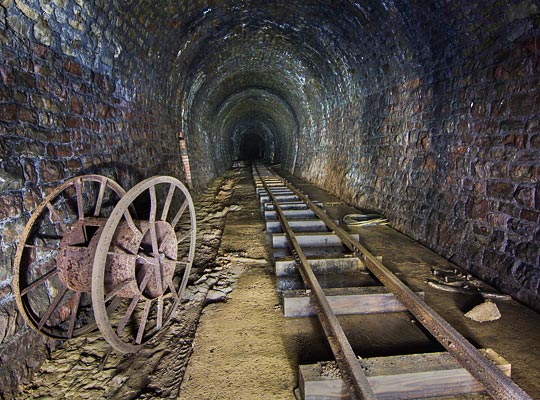
During the Second World War, the Admiralty used the tunnel for the storage of depth charges, torpedoes and mines from the Royal Ordnance factories at Swynnerton and Glascoed. The facility was remotely managed from Malvern but operated by a team of around a dozen men. To assist with the work, a narrow gauge railway was installed on the east side of the tunnel – laid on a concrete floor – whilst racks were built on the opposite side, supported by steelwork sitting on concrete plinths. Lighting was also provided throughout.
For protection, the site was enclosed by steel fencing, with guards on duty around the clock, accommodated in huts at both portals. The existing blockwalls are actually blast walls, erected as part of the conversion. Munitions were brought to site on a regular basis by trains of seven or eight wagons, and offloaded in a large transfer shed outside the tunnel before one of two battery-powered locomotives hauled them in to the storage area.
In 1906-7, the Lea Bailey gold mine was excavated close to the tunnel, but the enterprise failed as the quantities found were not commercially viable. After the First World War, this was extended several hundred yards for the extraction of iron ore, however only 3,000 tons had been removed before the workings were again abandoned.
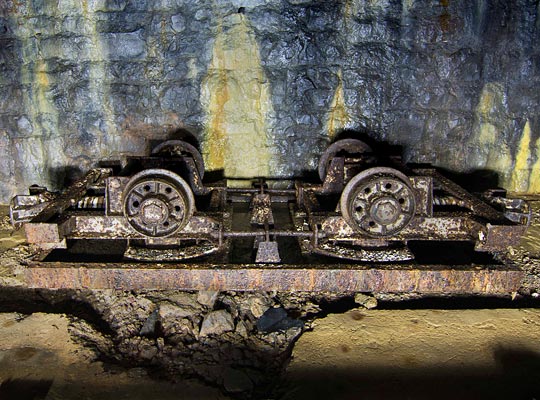
Members of the Royal Forest of Dean Caving Club visited Hawthorns Tunnel in 2012 and found much of the Admiralty’s railway equipment – including one of the locomotives and sections of track – to be still in situ, albeit rusting away. This prompted a preservation group to be established and a narrow gauge railway is now being developed around the entrance to the mine.

 Sept 2016