Bowshank Tunnel
Bowshank Tunnel
![The southern portal has a concrete facade and significant wing walls.](http://www.forgottenrelics.org/wp-content/uploads/2023/03/image1-79.jpg)
![Numerous functional refuges are provided through the southern and central sections, but there are none towards the north end.](http://www.forgottenrelics.org/wp-content/uploads/2023/03/image2-79.jpg)
![Although short, the tunnel incorporates a tight curve to the west.](http://www.forgottenrelics.org/wp-content/uploads/2023/03/image3-79.jpg)
![Several boards - presumably identifying chainages before their numbers were removed - are attached to the Up-side wall.](http://www.forgottenrelics.org/wp-content/uploads/2023/03/image4-79.jpg)
![In a couple of places, the profile of the tunnel widens, allowing false walls to be erected behind which small bothies have been created.](http://www.forgottenrelics.org/wp-content/uploads/2023/03/image5-79.jpg)
![A collection of bullhead chairs loiters in the tunnel.](http://www.forgottenrelics.org/wp-content/uploads/2023/03/image6-78.jpg)
![Two sections of roof arch towards the northern end have been removed, presumably tidying up previous failures.](http://www.forgottenrelics.org/wp-content/uploads/2023/03/image7-77.jpg)
![Bowshank Tunnel was the Waverley's structure No.75.](http://www.forgottenrelics.org/wp-content/uploads/2023/03/image8-70.jpg)
![The masonry portal at the north end, viewed from the lattice girder bridge that crosses Gala Water just beyond it.](http://www.forgottenrelics.org/wp-content/uploads/2023/03/image9-61.jpg)
![](http://www.forgottenrelics.org/wp-content/uploads/2023/03/image1-79.jpg)
![](http://www.forgottenrelics.org/wp-content/uploads/2023/03/image2-79.jpg)
![](http://www.forgottenrelics.org/wp-content/uploads/2023/03/image3-79.jpg)
![](http://www.forgottenrelics.org/wp-content/uploads/2023/03/image4-79.jpg)
![](http://www.forgottenrelics.org/wp-content/uploads/2023/03/image5-79.jpg)
![](http://www.forgottenrelics.org/wp-content/uploads/2023/03/image6-78.jpg)
![](http://www.forgottenrelics.org/wp-content/uploads/2023/03/image7-77.jpg)
![](http://www.forgottenrelics.org/wp-content/uploads/2023/03/image8-70.jpg)
![](http://www.forgottenrelics.org/wp-content/uploads/2023/03/image9-61.jpg)
Bowshank Tunnel is no longer a forgotten relic. This section of the former Waverley route was returned to operational service in June 2015 as part of the Borders Railway – a 35-mile route with ‘dynamic loops’, forming a link between Edinburgh and the Borders. It has a terminus at Tweedbank near Galashiels.
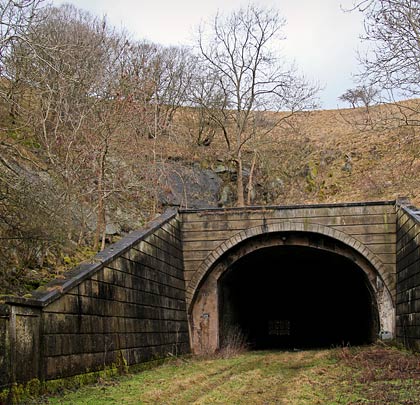
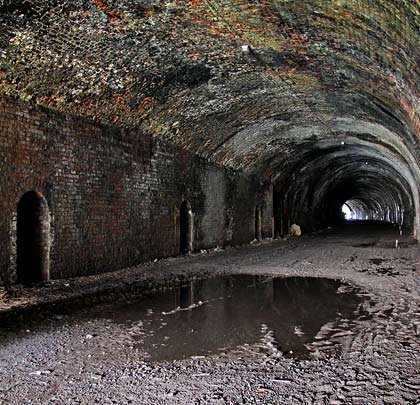
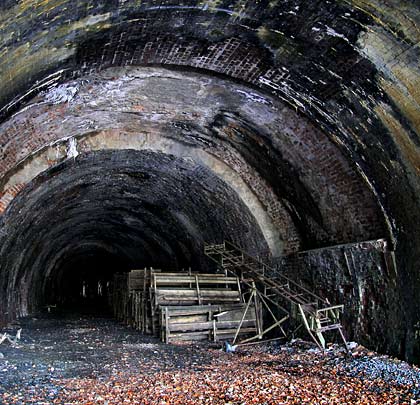
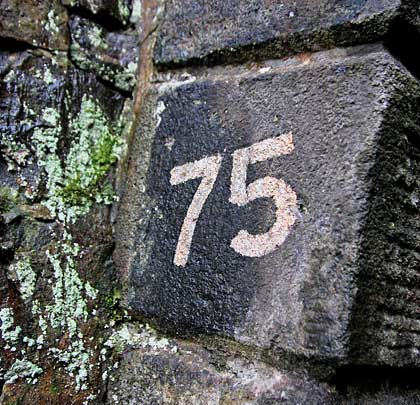
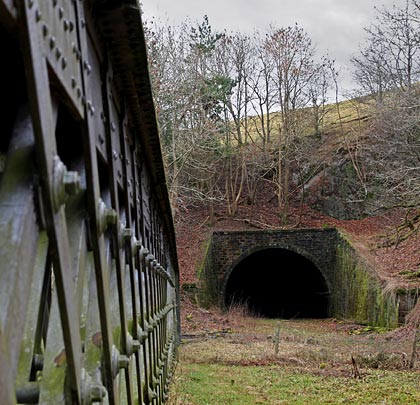
Structure number 75, the tunnel is 249 yards in length and incorporates a tight curve to the west. It pierces a promontory of land around which Gala Water flows. At its northern end, the portal is stone whilst the southern entrance imitates rustication in shuttered concrete. Considerable repair work was carried out in the 1950s, resulting in the tunnel being opened out at its southern end and two sections of brick arch being removed above springing level. A concrete saddle was cast in the void between the lining and bored rock face as strengthening.
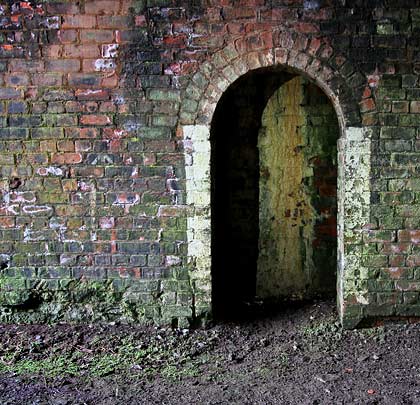
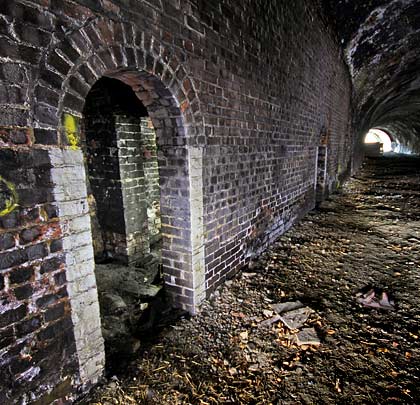
Refuges are provided through the central and southern sections. A false wall on the Down side created a space behind which was used as a platelayers’ bothy/storeroom, close to the tunnel’s midpoint.
Whilst disused, it was adopted by the local farmer as a store for livestock and machinery, and had lighting installed in the crown.
Immediately north are the remains of a termination box and a single-span lattice girder bridge over the river. This was built in cast iron with stone abutments.