Edlingham Viaduct
Edlingham Viaduct
![Viewed from the east, the viaduct disappears into the trees as Edlingham Castle seeks to overshadow it.](http://www.forgottenrelics.org/wp-content/uploads/2023/03/image1-287.jpg)
![Like a picture from the masons' catalogue, this view shows several different methods of dressing stone.](http://www.forgottenrelics.org/wp-content/uploads/2023/03/image2-287.jpg)
![The two southernmost arches are separated from the rest of the structure by a king pier featuring a pair of pilasters.](http://www.forgottenrelics.org/wp-content/uploads/2023/03/image3-287.jpg)
![Arch soffits in brick contrast with the rock-faced, margined voussoirs.](http://www.forgottenrelics.org/wp-content/uploads/2023/03/image4-284.jpg)
![The structure - now obscured by foliage - formed part of a curve that took the line through almost 180 degrees.](http://www.forgottenrelics.org/wp-content/uploads/2023/03/image5-279.jpg)
![Still apparent are the supports for the arches' timber centreing.](http://www.forgottenrelics.org/wp-content/uploads/2023/03/image6-269.jpg)
![Edlingham Viaduct was listed in 1987 as a result of its landscape value.](http://www.forgottenrelics.org/wp-content/uploads/2023/03/image7-253.jpg)
![Tie bars and pattress plates, located above the arches, hold the two sides of the viaduct together.](http://www.forgottenrelics.org/wp-content/uploads/2023/03/image8-220.jpg)
![The deck has been transformed into a track for agricultural traffic.](http://www.forgottenrelics.org/wp-content/uploads/2023/03/image9-184.jpg)
![](http://www.forgottenrelics.org/wp-content/uploads/2023/03/image1-287.jpg)
![](http://www.forgottenrelics.org/wp-content/uploads/2023/03/image2-287.jpg)
![](http://www.forgottenrelics.org/wp-content/uploads/2023/03/image3-287.jpg)
![](http://www.forgottenrelics.org/wp-content/uploads/2023/03/image4-284.jpg)
![](http://www.forgottenrelics.org/wp-content/uploads/2023/03/image5-279.jpg)
![](http://www.forgottenrelics.org/wp-content/uploads/2023/03/image6-269.jpg)
![](http://www.forgottenrelics.org/wp-content/uploads/2023/03/image7-253.jpg)
![](http://www.forgottenrelics.org/wp-content/uploads/2023/03/image8-220.jpg)
![](http://www.forgottenrelics.org/wp-content/uploads/2023/03/image9-184.jpg)
In 1881, plans to extend the Rothbury branch northwards to Cornhill – known as the Central Northumberland Railway – faced vigorous opposition from the traders of Alnwick, fearful that valuable agricultural traffic from Wooler would disappear to rival markets in Rothbury. And so, with some reluctance, the North Eastern Railway was prompted to promote its own 36-mile line from the existing terminus at Alnwick to Cornhill via Wooler. The company’s proposal was by far the cheaper and an enabling Act passed through Parliament on 19th May 1882. Having cost £272,266 to build, communities along the route joined the age of the train on 5th September 1887.
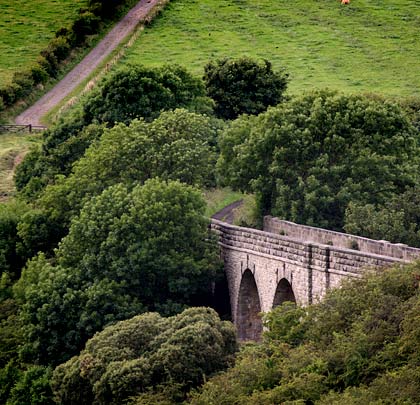
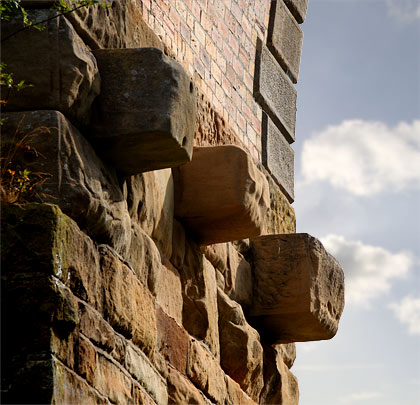
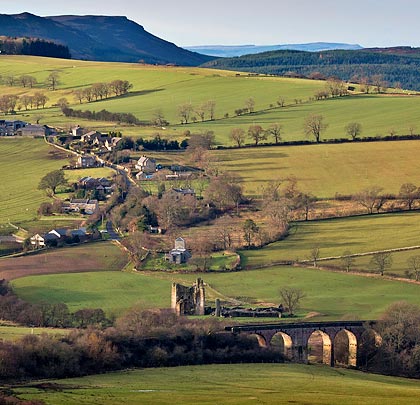
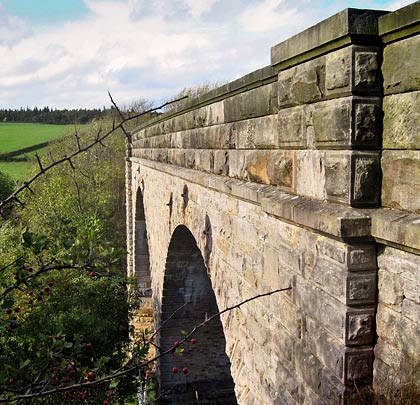
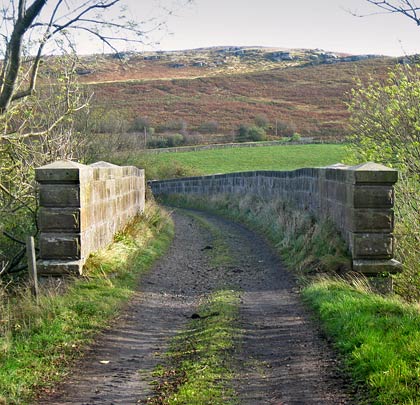
As it encountered the valley of Edlingham Burn, the line headed south before turning through almost 180 degrees. Just north of Edlingham Station, it crossed the river on a curved viaduct of five arches – the southern pair separated from the others by a king pier with paired pilasters. Carrying a single track, the structure was built predominantly from snecked stone except for the margined and faced voussoirs and brick arch soffits. Tie bars and pattress plates have been inserted above the arches for strengthening.
The route was not a roaring commercial success. Passenger services were withdrawn on 22nd September 1930, just 43 years after they started; the section of line over the viaduct closed completely on 2nd March 1953.
Since 1987 the structure has benefited from a Grade II listing, resulting largely from its significant landscape value. The deck now accommodates a track used by farm machinery.
(John Dalrymple’s photo is used under this Creative Commons licence.)