Balbirnie Viaduct
Balbirnie Viaduct
![The viaduct is aligned south-west to north-east and includes a curve of around 35 chains radius at the Markinch end.](http://www.forgottenrelics.org/wp-content/uploads/2023/03/image1-242.jpg)
![It reaches its greatest height as it crosses the River Leven.](http://www.forgottenrelics.org/wp-content/uploads/2023/03/image2-242.jpg)
![The piers are protected by cutwaters whilst their faces still feature the stone blocks used to support the arch centring.](http://www.forgottenrelics.org/wp-content/uploads/2023/03/image3-242.jpg)
![Most of the spans have been extensively strapped; this arch - just four bricks thick - is seriously flattened close to the crown.](http://www.forgottenrelics.org/wp-content/uploads/2023/03/image4-239.jpg)
![Water escapes through weep pipes in the piers and arch soffits.](http://www.forgottenrelics.org/wp-content/uploads/2023/03/image5-236.jpg)
![The structure is masonry built except for its red brick arches, some of which have been patch repaired in blue brindles.](http://www.forgottenrelics.org/wp-content/uploads/2023/03/image6-227.jpg)
![A pattress plate above one of the piers.](http://www.forgottenrelics.org/wp-content/uploads/2023/03/image7-216.jpg)
![Balbirnie Viaduct has been repurposed as host to a cycle path.](http://www.forgottenrelics.org/wp-content/uploads/2023/03/image8-191.jpg)
![](http://www.forgottenrelics.org/wp-content/uploads/2023/03/image1-242.jpg)
![](http://www.forgottenrelics.org/wp-content/uploads/2023/03/image2-242.jpg)
![](http://www.forgottenrelics.org/wp-content/uploads/2023/03/image3-242.jpg)
![](http://www.forgottenrelics.org/wp-content/uploads/2023/03/image4-239.jpg)
![](http://www.forgottenrelics.org/wp-content/uploads/2023/03/image5-236.jpg)
![](http://www.forgottenrelics.org/wp-content/uploads/2023/03/image6-227.jpg)
![](http://www.forgottenrelics.org/wp-content/uploads/2023/03/image7-216.jpg)
![](http://www.forgottenrelics.org/wp-content/uploads/2023/03/image8-191.jpg)
Extending for 4¼ miles from Markinch, the single-track Leslie Railway received royal assent in 1857 and opened for both goods and passenger traffic on Friday 1st February 1861. Its main source of income came from several local paper mills.
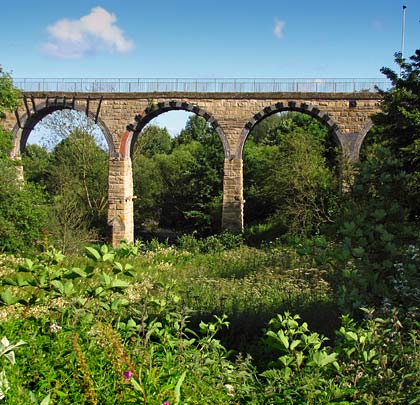
Engineered by the prolific and ill-fated Thomas Bouch, the line featured two substantial viaducts at opposite ends: Leslie (or Cabbagehall) on the approach to the terminus’ buffer stops and Balbirnie, just to the west of Auchmuty Junction from where a branch ran to Auchmuty mills. The latter is 125 yards long and features a curve to the east of around 18 chains in radius through its northern half. Like Leslie Viaduct, the need for it was driven by the Earl of Rothes’ unwillingness to allow the railway to cross his land.
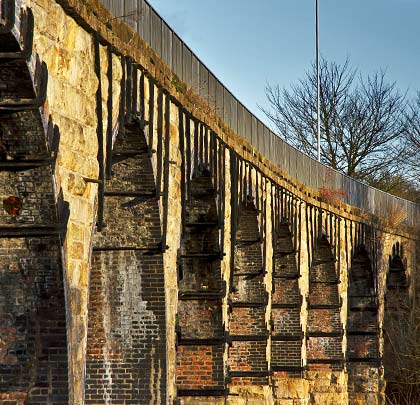
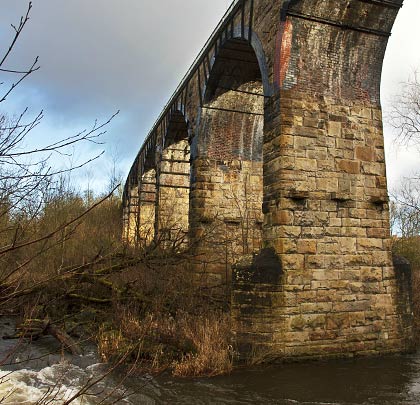
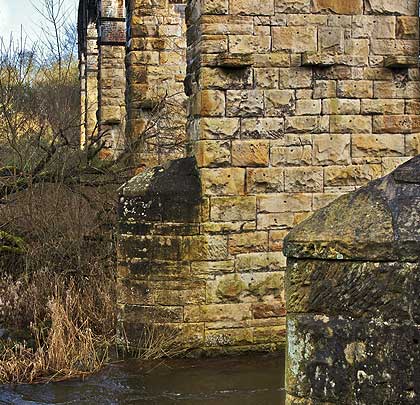
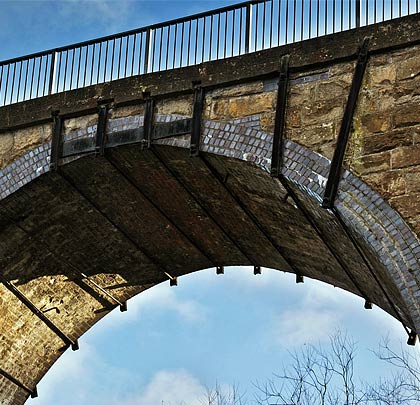
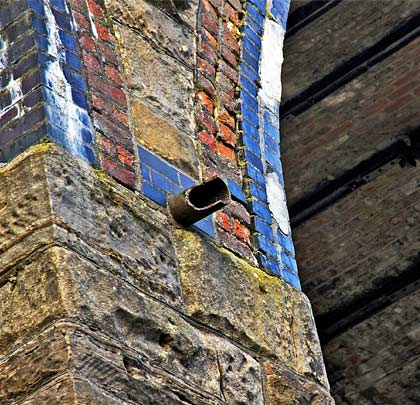
The structure comprises ten semi-circular arches of four brick rings with bull-faced rubble piers; those standing in the river benefit from coped cutwaters. Prominent supports for the timber centring are apparent. Several of the arches have suffered distortion over the years (very noticeable in a couple of cases) and most are therefore restrained by cast-iron ties beneath the brickwork. Spot refacing of the spandrels – which are heavily strapped at the north end – has been carried out in engineering brick.
The Leslie Railway was consumed into the North British empire in 1872 but closure came to most of it on 9th October 1967; trains however continued to serve Auchmuty paper mills. Balbirnie Viaduct was afforded a Grade B listing in November 1972 and was incorporated into the area’s network of foot and cycle paths in 2007.